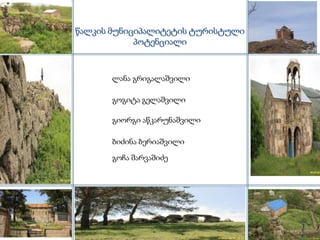
წალკის ტურისტული პოტენციალი
•Transferir como PPTX, PDF•
1 gostou•1,805 visualizações

პრეზენტაცია მომზადებულია ილიას სახელმწიფო უნივერსიტეტის პროგრამა ,,საქართველოს ტურისტული რესურსების ფარგლებში, გოჩა შარვაშიძის მიერ.

Recomendados
Mais conteúdo relacionado
Destaque
Destaque (20)
Semelhante a წალკის ტურისტული პოტენციალი
Semelhante a წალკის ტურისტული პოტენციალი (18)
Mais de Gocha Sharvashidze
Mais de Gocha Sharvashidze (20)
წალკის ტურისტული პოტენციალი
- 1. წალკის მუნიციპალიტეტის ტურისტული პოტენციალი ლანა გრიგალაშვილი გოგიტა გელაშვილი გიორგი აწკარუნაშვილი ბიძინა ბერიაშვილი გოჩა შარვაშიძე
- 2. წალკის მუნიციპალიტეტი 1 • მდებარეობა 2 • ისტორიული მომოხილვა 3 • მოსახლეობა
- 3. IIდღე ფლორა და ფაუნა გავრცელებულია მთის სტეპები და მთის მდელოები. რაიონის მთის სტეპებისათვის ტიპიურია მარცვლოვანი და მარცვლოვან-ბალახოვანი დაჯგუფებები, რომელსაც ქმნიან ურო, ვაციწვერა, შვრიელა, კეწეწურა, მდელოს წივანა. რაიონში ბინადრობს: შველი, ტურა, მელა, მგელი; ბევრია მღრღნელი: თაგვი, ბუჩქნარის მემინდვრია, ზაზუნა და სხვ.;. მდინარეები, ტბები და წალკის წყალსაცავი მდიდარია თევზით (ხრამულა, მტკვრის წვერა, ქაშაპი, კალმახი, კობრი, და სხვ.)
- 4. შიგა წყლები რაიონი მდიდარია ჰიდრო რესურსებით. მთავარი მდინარე ჯანმუშგიოლის და ხადიკის რაიონში ბევრი ტბაა, მათ შორის ბაშქოის, უზუნგიოლის, ხრამი (ზემო დინებაში ქციად წოდებული), რომლისმნიშვნელოვანი ჰიდროლოგიური. ობიექტია წალკის წყალსაცავი. ნარდევანი. მარცხენა შენაკადებია მარჯვენა _ ჭოჭიანი, ბეიუქდერესი, აიაზმიდერე და _ თარსონი, სულახი, გუმბათი, ტუსრები
- 5. აიაზმა (თეთრიწყარო) აიაზმა (ყოფილი თეთრიწყარო) - სოფელი წალკის რაიონში, წალკის ქვაბულის სამხრეთ - დასავლეთ ნაწილში, წალკიდან 18 კმ-ზე, აიაზმის ეკლესიის კედელზე, არსებული წარწერის მიხედვით ირკვევა, რომ ძეგლი 1045 წელს აღუგიათ.
- 6. ბეშთაშენის ციხე და ეკლესია ბეშთაშენი-სოფელი წალკის რაიონში მდ.აღრის მარცხენა ნაპირას, ზღვის დონიდან 1540 მ-ზე. ბეშთაშენში ყოფილა ციხე რომელიც საკმაოდ კარგ მდგომარეობაში იყო შემონახული მაგრამ ბეშთაშენის წმინდა გიორგის ეკლესია დროთა განმავლობაში ციხის ქვები მოსახლეობას მშენებლობისთვის გამოუყენებიათ. ამჟამად ციხე მთლიანად დანგრეულია. ბეშთაშენის ციხე
- 7. ავრანლო ციხე და ეკლესია ავრანლოს ციხე მდინარე ქციის მარცხენა სანაპიროზე მდებარეობს.ის სამი საფეხურისგან შედგება.ქვედა საშუალო და ზედა. ნაციხარის შემადგენლობაში პატარა ეკლესიაც შედის რომელიც მოგვიანებით აუშენებიათ
- 8. დაშბაშის ეკლესია გუმბათის ეკლესია ნარდევანი თეჯისი თეჯისი (ყოფილი ჩოლაყი) ნარდევანი - სოფელიქართლის გუმბათი — ქვემო წალკიდან დაშბაში - ასე ეწოდება წალკის სოფელი წალკის მუნიციპალიტეტში. მხარის წალკისმდებარეობს წმ. რაიონში, სოფლის ცენტრში 4სოფელში მუნიციპალიტეტში. კილომეტრზე მდებარე მდებარეობს წალკის ქვაბულის მდებარეობს მე-11 საუკუნის ნიკოლოზის სახელობის ეკლესია სოფელს სადაც მდინარე ქციას ეკლესია რომელსაც შემოვლებული დასავლეთ ნაწილში, ქვებით რომელსაც გიგანტურიზღვის კლდოვან ნაპირზე პატარა აქვს ქვის გალავანი. მისსაუკუნეების დონიდან 1520.იქ შუა მახლობლად ნაგები მდებარეობს. ეკლესიაგალავანი აქვს მდებარეობს ციხისმდებარეობს. ციხე და ეკლესია ნანგრევებიც შემორტყმული.
- 9. სვოტ ანალიზი ძლიერი მხარეები • აქ მდებარეობს საქართველოში უდიდესი წყალსაცავი • ჰიდროლოგიური რესურსების მრავალფეროვნება • ქვით ნაშენი მეგალითური ნაგებობები • მოსახერხებელი სატრანსპორტო მედებარეობა სუსტი მხარეები საფრთხეები • მკაცრი ზამთარი • წყალმოვარდნები გაზაფხულსა და შემოდგომაზე • არსებული ტურისტული რესურსების შესახებ ინფორმაციის არ არსებობა შესაძლებლობები • კულტურული ძეგლების ნაკლებობა • სამთო ტურიზმის განვითარება • ტურისტული ინფრასტრუქტურის არ არსებობა • განთავსების საშუალებები • სალაშქრო ტურიზმის განვითარება • საგზაო ინფრასტრუქტურა • აგრო ტურიზმის განვითარება
Notas do Editor
- Animated picture fly in and box out(Intermediate)Tip: For best results when reproducing the picture effect on this slide, you may want to use the Snap objects to other objects feature. To do so, right-click the slide background and then click Grid and Guides. Under Snap to, select Snap objects to other objects.To reproduce the picture effects on this slide, do the following:On the Home tab, in the Slides group, click Layout and then clickBlank. On the Insert tab, in the Images group, click Picture.In the Insert Picture dialog box, select a picture and then click Insert.On the slide, select the picture. Under Picture Tools, on the Format tab, in the bottom right corner of the Size group, click the Size & Position dialog box launcher. In the Format Picture dialog box, resize or crop the image so that the height is set to 4” and the width is set to 5.33”. To crop the picture, click Crop in the left pane, and in the Croppane, under Crop position, enter values into the Left, Right, Top, and Bottom boxes. To resize the picture, click Size in the left pane, and in the Size pane, under Size and rotate, enter values into the Height and Width boxes.On the Home tab, in the Drawing group, click Arrange,point to Align, and then do the following: Click Align to Slide.Click Align Center.Click Align Middle.On the Home tab, in the Drawing group, click Shapes, and then under Rectangles click Rectangle (first option from the left).On the slide, drag to draw a rectangle.Select the rectangle. Under DrawingTools, on the Format tab, in the Size group, do the following:In the in the Shape Height box, enter 0.05”.In the Shape Width box, enter 10.3”.Under DrawingTools, on the Format tab, in the Shape Styles group, click the arrow next to Shape Fill, and then click Blue, Accent 1 (first row, fifth option from the left).Under DrawingTools, on the Format tab, in the Shape Styles group, click Shape Effects, point to Preset, and then under Presets, click Preset 8 (second row, fourth option from the left).Select the rectangle. On the Home tab, in the Clipboard group, click the arrow to the right of Copy, and then click Duplicate.Repeat this process three more times for a total of four rectangles.Drag one of the rectangles until the bottom edge of the rectangle meets the top edge of the picture.Drag another rectangle until the top edge of the rectangle meets the bottom edge of the picture.Press and hold CTRL, and then select the other two rectangles. Under DrawingTools, on the Format tab, in the Size group, do the following: In the Shape Height box, enter 7.8”.In the Shape Width box, enter 0.05”.Drag one of the vertical rectangles until the right edge of the rectangle meets the left edge of the picture.Drag the other vertical rectangle until the left edge of the rectangle meets the right edge of the picture. Press and hold CTRL, and then select both of the horizontal (top and bottom) rectangles. On the Home tab, in the Drawing group, click Arrange, point to Align, and then do the following:Click Align to Slide.Click AlignCenter.Press and hold CTRL, and then select both of the vertical (left and right) rectangles. On the Home tab, in the Drawing group, click Arrange, point to Align, and then do the following:Click Align to Slide.Click AlignMiddle.To reproduce the animation effects on this slide, do the following:Press and hold CTRL, and then select the four rectangles on the slide. On the Animations tab, in the AdvancedAnimation group, click AddAnimation, and then under Entrance click Fly In.On the Animations tab, in the Timing group, do the following:In the Start list, select With Previous.In the Duration box, enter 2.0.On the slide, select the top horizontal rectangle. On the Animations tab, in the Animation group, click EffectOptions, and then click FromBottom.On the slide, select the bottom horizontal rectangle. On the Animations tab, in the Animation group, click EffectOptions, and then clickFrom Top.On the slide, select the left vertical rectangle. On the Animations tab, in the Animation group, click EffectOptions, and then clickFrom Right.On the slide, select the right vertical rectangle. On the Animations tab, in the Animation group, click EffectOptions, and then click From Left.On the slide, select the picture. On the Animations tab, in the AdvancedAnimation group, click AddAnimation, and then click More Entrance Effects. In the Add Entrance Effect dialog box, under Basic, click Box, and then click OK.With the picture selected, also on the Animations tab, in the Animation group, click EffectOptions, and then click Out.Also on the Animations tab, in the Timing group, do the following:In the Start list, select With Previous.In the Duration box, enter 0.7In the Delay box, enter 1.3.Press and hold CTRL, and then select the four rectangles on the slide. On the Animations tab, in the AdvancedAnimation group, click AddAnimation, and then under Exit click Fly Out.Also on the Animations tab, in the Timing group, do the following:In the Start list, select With Previous.In the Duration box, enter 2.0. Also on the Animations tab, in the AdvancedAnimation group, click AnimationPane. On the slide, select the top horizontal rectangle. In the Animation Pane, select the highlighted fly-out effect. In the Animation group, click EffectOptions, and then click ToBottom. On the slide, select the bottom horizontal rectangle. In the Animation Pane, select the highlighted fly-out effect. In the Animation group, click EffectOptions, and then click To Top.On the slide, select the left vertical rectangle. In the Animation Pane, select the highlighted fly-out effect. In the Animation group, click EffectOptions, and then click To Right.On the slide, select the right vertical rectangle. In the Animation Pane, select the highlighted fly-out effect. In the Animation group, click EffectOptions, and then click To Left.On the slide, select the picture. On the Animations tab, in the AdvancedAnimation group, click AddAnimation, and then click More Exit Effects. In the Add Exit Effect dialog box, under Basic, click Box, and then click OK.In the AnimationPane, select the 10th animation (box exit effect). In the Animation group, click EffectOptions, and then click In.On the Animations tab, in the Timing group, do the following:In the Start list, select WithPreviousIn the Duration box, enter 0.7.To reproduce the background effects on this slide, do the following:Right-click the slide background area, and then click Format Background. In the Format Backgrounddialog box, click Fill in the left pane, select Gradient fill in the Fill pane, and then do the following:In the Type list, select Linear.Click the button next to Direction, and then click Linear Down (first row, second option from the left).Under Gradient stops, click Add gradient stops or Remove gradient stops until two stops appear in the slider.Also under Gradient stops, customize the gradient stops as follows:Select the first stop from left in the slider, and then do the following:In the Stop position box, enter 46%.Click the button next to Color, and then under Theme Colors click White, Background 1 (first row, first option from the left).Select the second stop from the leftin the slider, and then do the following: In the Stop position box, enter 100%.Click the button next to Color, and then under Theme Colors click Blue, Accent 1, Lighter 60% (third row, fifth option from the left).
- Animated pictures fly in from gray to full color(Advanced)Tip: For the effects on this slide, it is recommended to use pictures with a “portrait” (vertical) orientation. To reproduce the text effects on this slide, do the following:On the Home tab, in the Slides group, click Layout, and then clickBlank. On the Insert tab, in the Text group, click Text Box, and then on the slide, drag to draw the text box.Enter text in the text box, and then select the text. On the Home tab, in the Font group, select Georgiafrom the Font list, enter 34 in the Font Size box, click Italic, click the arrow next to Font Color, and then under Theme Colors click Aqua, Accent 5, Darker 25% (fifth row, ninth option from the left).Drag the text box into the upper half of the slide, slightly left of the center.To reproduce the first picture with animation effects on this slide, do the following:On the Insert tab, in the Images group, click Picture.In the Insert Picture dialog box, select a picture and then click Insert. On the slide, select the picture. Under Picture Tools, on the Format tab, in the bottom right corner of the Size group, click the Size and Position dialog box launcher. In the Format Picture dialog box, resize or crop the picture as needed so that the height is set to 3.81” and the width is set to 2.54”. To crop the picture, click Crop in the left pane, and in the Crop pane, under Crop position, enter values into the Height, Width, Left, and Top boxes. To resize the picture, click Size in the left pane, and in the Size pane, under Size and rotate, enter values into the Height and Width boxes.Drag the picture into the into the top left corner of the slide. (Note: Align the left edge of the picture with the left edge of the slide, and leave a small margin between the top edge of the picture and the top edge of the slide.)Select the picture. Under PictureTools, on the Format tab, in the bottom right corner of the Picture Styles group, click the Format Picture dialog box launcher.In the Format Picture dialog box, in the left pane click Picture Correction, in the Picture Correction pane, under Brightness and Contrast, in the Brightness box, enter 50%.Also in the Format Picture dialog box, in the left pane click Picture Color, in the Picture Color pane, under Recolor, click the button next to Presets and click Grayscale.On the Animations tab, in the Advanced Animation group, click Add Animation, and then under Entrance click Fly In.Also on the Animations tab, in the Animation group, click Effect Option, and then click From Left.Also on the Animations tab, in the Timing group, do the following:In the Start list, select With Previous.In the Duration box, enter 1.00 seconds.Also on the Animations tab, in the Advanced Animation group, click Add Animation, and then click More Entrance Effects. In the Add Entrance Effect dialog box,under Subtle, click Expand, and then click OK.Also on the Animations tab, in the Timing group, do the following:In the Start list, select With Previous.In the Duration box, enter 1.00 seconds.To reproduce the second picture with animation effects on this slide, do the following:On the slide, select the picture. On the Home tab, in the Clipboard group, click the arrow to the right of Copy, and then click Duplicate.Drag the second picture until its left side slightly overlaps the right side of the first picture.Select the second picture. Under PictureTools, on the Format tab, in the bottom right corner of the Picture Styles group, click the Format Picture dialog box launcher. In the Format Picture dialog box, in the left pane click Picture Corrections, in the PictureCorrection pane, under Brightness and Contrast, in the Brightness box, enter 40%.On the Animations tab, in the Advanced Animation group, click Animation Pane.Press and hold CTRL, and then select the third and fourth animation effects (fly-in and expand effects for the second picture) in the Animation Pane. On the Animations tab, in the Timing group, in the Delay box, enter 0.2.To reproduce the third picture with animation effects on this slide, do the following:On the slide, select the second picture. On the Home tab, in the Clipboard group, click the arrow to the right of Copy, and then click Duplicate.Drag the third picture until its left side slightly overlaps the right side of the second picture.Select the third picture. Under PictureTools, on the Format tab, in the bottom right corner of the Picture Styles group, click the Format Picture dialog box launcher. In the Format Picture dialog box, in the left pane click Picture Corrections, in the Picture Corrections pane, under Brightness and Contrast, in the Brightness box, enter 20%. Press and hold CTRL, and then select the fifth and sixth animation effects (fly-in and expand effects for the third picture) in the Animation Pane. On the Animations tab, in the Timing group, in the Delay box, enter 0.4.To reproduce the fourth picture with animation effects on this slide, do the following:On the slide, select the third picture. On the Home tab, in the Clipboard group, click the arrow to the right of Copy, and then click Duplicate.Drag the fourth picture until its left side slightly overlaps the right side of the third picture.Select the fourth picture. Under PictureTools, on the Format tab, in the bottom right corner of the Picture Styles group, click the Format Picture dialog box launcher. In the Format Picture dialog box, in the left pane click Picture Corrections, in the Picture Corrections pane, under Brightness and Contrast, in the Brightness box, enter 0%. Press and hold CTRL, and then select the seventh and eighth animation effects (fly-in and expand effects for the fourth picture) in the Animation Pane. On the Animations tab, in the Timing group, in the Delay box, enter 0.6.To reproduce the fifth picture with animation effects on this slide, do the following:On the slide, select the fourth picture. On the Home tab, in the Clipboard group, click the arrow to the right of Copy, and then click Duplicate.Drag the fifth picture until its left side slightly overlaps the right side of the fourth picture.Select the fifth picture. Under PictureTools, on the Format tab, in the bottom right corner of the Picture Styles group, click the Format Shape dialog box launcher. Also in the Format Picture dialog box, in the left pane click Picture Color, in the Picture Color pane, under Recolor, click the button next to Presets and click No Recolor.Press and hold CTRL, and then select the ninth and 10th animation effects (fly-in and expand effects for the fifth picture) in the Animation Pane. On the Animations tab, in the Timing group, in the Delay box, enter 0.8.To reproduce the animation effects for the text box on this slide, do the following:On the Home tab, in the Editing group, click Select, and then click Selection Pane.In the Selection and Visibility pane, select the text box. On the Animations tab, in the Advanced Animation group, click Add Animation, and then under Entrance click Fade.Also on the Animations tab, in the Timing group, do the following:In the Start list, select With Previous.In the Duration box, enter 0.50 seconds.In the Delay box, enter 1.30 seconds.In the Selection and Visibility pane, press and hold CTRL, and then select the first, second, third, and fourth pictures. On the Animations tab, in the AdvancedAnimation group, click Add Animation, and then under Exit click Fade.Also on the Animations tab, in the Timing group, do the following:In the Start list, select With Previous.In the Duration list, select 1.00 second.In the Animation Pane, select the 12th animation effect (first fade effect). On the Animations tab, in the Timing group, in the Delay box enter 1.40 seconds.In the Animation Pane, select the 13th animation effect (second fade effect). On the Animations tab, in the Timing group, in the Delay box enter 1.60 seconds.In the Animation Pane, select the 14th animation effect (third fade effect). On the Animations tab, in the Timing group, in the Delay box enter 1.80 seconds.In the Animation Pane, select the 15th animation effect (fourth fade effect). On the Animations tab, in the Timing group, in the Delay box enter 2.00 seconds.To reproduce the background effects on this slide, do the following:Right-click the slide background area, and then click Format Background. In the Format Background dialog box, click Fill in the left pane, select Gradient fill in the right pane, and then do the following:In the Type list, select Radial.Click the button next to Direction, and then click From Center (third option from the left).Under Gradient stops, click Add gradient stops or Remove gradient stops until three stops appear in the drop-down list.Also under Gradient stops, customize the gradient stops as follows:Select the first stop in the slider, and then do the following:In the Position box, enter 0%.Click the button next to Color, and then under Theme Colors click White, Background 1, Darker 5%(second row, first option from the left). Select the next stop in the slider, and then do the following: In the Position box, enter 34%.Click the button next to Color, and then under Theme Colors click White, Background 1, Darker 15% (third row, first option from the left). Select the last stop in the slider, and then do the following: In the Position box, enter 100%.Click the button next to Color, and then under Theme Colors click White, Background 1, Darker 50% (sixth row, first option from the left).
- Animated pictures fly in from gray to full color(Advanced)Tip: For the effects on this slide, it is recommended to use pictures with a “portrait” (vertical) orientation. To reproduce the text effects on this slide, do the following:On the Home tab, in the Slides group, click Layout, and then clickBlank. On the Insert tab, in the Text group, click Text Box, and then on the slide, drag to draw the text box.Enter text in the text box, and then select the text. On the Home tab, in the Font group, select Georgiafrom the Font list, enter 34 in the Font Size box, click Italic, click the arrow next to Font Color, and then under Theme Colors click Aqua, Accent 5, Darker 25% (fifth row, ninth option from the left).Drag the text box into the upper half of the slide, slightly left of the center.To reproduce the first picture with animation effects on this slide, do the following:On the Insert tab, in the Images group, click Picture.In the Insert Picture dialog box, select a picture and then click Insert. On the slide, select the picture. Under Picture Tools, on the Format tab, in the bottom right corner of the Size group, click the Size and Position dialog box launcher. In the Format Picture dialog box, resize or crop the picture as needed so that the height is set to 3.81” and the width is set to 2.54”. To crop the picture, click Crop in the left pane, and in the Crop pane, under Crop position, enter values into the Height, Width, Left, and Top boxes. To resize the picture, click Size in the left pane, and in the Size pane, under Size and rotate, enter values into the Height and Width boxes.Drag the picture into the into the top left corner of the slide. (Note: Align the left edge of the picture with the left edge of the slide, and leave a small margin between the top edge of the picture and the top edge of the slide.)Select the picture. Under PictureTools, on the Format tab, in the bottom right corner of the Picture Styles group, click the Format Picture dialog box launcher.In the Format Picture dialog box, in the left pane click Picture Correction, in the Picture Correction pane, under Brightness and Contrast, in the Brightness box, enter 50%.Also in the Format Picture dialog box, in the left pane click Picture Color, in the Picture Color pane, under Recolor, click the button next to Presets and click Grayscale.On the Animations tab, in the Advanced Animation group, click Add Animation, and then under Entrance click Fly In.Also on the Animations tab, in the Animation group, click Effect Option, and then click From Left.Also on the Animations tab, in the Timing group, do the following:In the Start list, select With Previous.In the Duration box, enter 1.00 seconds.Also on the Animations tab, in the Advanced Animation group, click Add Animation, and then click More Entrance Effects. In the Add Entrance Effect dialog box,under Subtle, click Expand, and then click OK.Also on the Animations tab, in the Timing group, do the following:In the Start list, select With Previous.In the Duration box, enter 1.00 seconds.To reproduce the second picture with animation effects on this slide, do the following:On the slide, select the picture. On the Home tab, in the Clipboard group, click the arrow to the right of Copy, and then click Duplicate.Drag the second picture until its left side slightly overlaps the right side of the first picture.Select the second picture. Under PictureTools, on the Format tab, in the bottom right corner of the Picture Styles group, click the Format Picture dialog box launcher. In the Format Picture dialog box, in the left pane click Picture Corrections, in the PictureCorrection pane, under Brightness and Contrast, in the Brightness box, enter 40%.On the Animations tab, in the Advanced Animation group, click Animation Pane.Press and hold CTRL, and then select the third and fourth animation effects (fly-in and expand effects for the second picture) in the Animation Pane. On the Animations tab, in the Timing group, in the Delay box, enter 0.2.To reproduce the third picture with animation effects on this slide, do the following:On the slide, select the second picture. On the Home tab, in the Clipboard group, click the arrow to the right of Copy, and then click Duplicate.Drag the third picture until its left side slightly overlaps the right side of the second picture.Select the third picture. Under PictureTools, on the Format tab, in the bottom right corner of the Picture Styles group, click the Format Picture dialog box launcher. In the Format Picture dialog box, in the left pane click Picture Corrections, in the Picture Corrections pane, under Brightness and Contrast, in the Brightness box, enter 20%. Press and hold CTRL, and then select the fifth and sixth animation effects (fly-in and expand effects for the third picture) in the Animation Pane. On the Animations tab, in the Timing group, in the Delay box, enter 0.4.To reproduce the fourth picture with animation effects on this slide, do the following:On the slide, select the third picture. On the Home tab, in the Clipboard group, click the arrow to the right of Copy, and then click Duplicate.Drag the fourth picture until its left side slightly overlaps the right side of the third picture.Select the fourth picture. Under PictureTools, on the Format tab, in the bottom right corner of the Picture Styles group, click the Format Picture dialog box launcher. In the Format Picture dialog box, in the left pane click Picture Corrections, in the Picture Corrections pane, under Brightness and Contrast, in the Brightness box, enter 0%. Press and hold CTRL, and then select the seventh and eighth animation effects (fly-in and expand effects for the fourth picture) in the Animation Pane. On the Animations tab, in the Timing group, in the Delay box, enter 0.6.To reproduce the fifth picture with animation effects on this slide, do the following:On the slide, select the fourth picture. On the Home tab, in the Clipboard group, click the arrow to the right of Copy, and then click Duplicate.Drag the fifth picture until its left side slightly overlaps the right side of the fourth picture.Select the fifth picture. Under PictureTools, on the Format tab, in the bottom right corner of the Picture Styles group, click the Format Shape dialog box launcher. Also in the Format Picture dialog box, in the left pane click Picture Color, in the Picture Color pane, under Recolor, click the button next to Presets and click No Recolor.Press and hold CTRL, and then select the ninth and 10th animation effects (fly-in and expand effects for the fifth picture) in the Animation Pane. On the Animations tab, in the Timing group, in the Delay box, enter 0.8.To reproduce the animation effects for the text box on this slide, do the following:On the Home tab, in the Editing group, click Select, and then click Selection Pane.In the Selection and Visibility pane, select the text box. On the Animations tab, in the Advanced Animation group, click Add Animation, and then under Entrance click Fade.Also on the Animations tab, in the Timing group, do the following:In the Start list, select With Previous.In the Duration box, enter 0.50 seconds.In the Delay box, enter 1.30 seconds.In the Selection and Visibility pane, press and hold CTRL, and then select the first, second, third, and fourth pictures. On the Animations tab, in the AdvancedAnimation group, click Add Animation, and then under Exit click Fade.Also on the Animations tab, in the Timing group, do the following:In the Start list, select With Previous.In the Duration list, select 1.00 second.In the Animation Pane, select the 12th animation effect (first fade effect). On the Animations tab, in the Timing group, in the Delay box enter 1.40 seconds.In the Animation Pane, select the 13th animation effect (second fade effect). On the Animations tab, in the Timing group, in the Delay box enter 1.60 seconds.In the Animation Pane, select the 14th animation effect (third fade effect). On the Animations tab, in the Timing group, in the Delay box enter 1.80 seconds.In the Animation Pane, select the 15th animation effect (fourth fade effect). On the Animations tab, in the Timing group, in the Delay box enter 2.00 seconds.To reproduce the background effects on this slide, do the following:Right-click the slide background area, and then click Format Background. In the Format Background dialog box, click Fill in the left pane, select Gradient fill in the right pane, and then do the following:In the Type list, select Radial.Click the button next to Direction, and then click From Center (third option from the left).Under Gradient stops, click Add gradient stops or Remove gradient stops until three stops appear in the drop-down list.Also under Gradient stops, customize the gradient stops as follows:Select the first stop in the slider, and then do the following:In the Position box, enter 0%.Click the button next to Color, and then under Theme Colors click White, Background 1, Darker 5%(second row, first option from the left). Select the next stop in the slider, and then do the following: In the Position box, enter 34%.Click the button next to Color, and then under Theme Colors click White, Background 1, Darker 15% (third row, first option from the left). Select the last stop in the slider, and then do the following: In the Position box, enter 100%.Click the button next to Color, and then under Theme Colors click White, Background 1, Darker 50% (sixth row, first option from the left).
- Animated picture changes during motion path(Advanced)To reproduce the first picture effect on this slide, do the following:On the Home tab, in the Slides group, click Layout and then click Blank. On the Insert tab, in the Images group, click Picture. In the Insert Picture dialog box, select a picture, and then click Insert. Under Picture Tools, on the Format tab, in the bottom right corner of the Size group, click the Size and Position dialog box launcher. In the Format Picture dialog box, resize or crop the picture as needed so that the height is set to 2” and the width is set to 2”. To crop the picture, click Crop in the left pane, and in the Crop pane, under Crop position, enter values into the Height, Width, Left, and Top boxes. To resize the picture, click Size in the left pane, and in the Size pane, under Size and rotate, enter values into the Height and Width boxes.Also in the Format Picture dialog box, click Line Color in the left pane. In the Line Color pane, select Solid line, click the button next to Color, and then under Theme Colors click White, Background 1 (first row, first option from the left).Also in the Format Picture dialog box, click Line Style in the left pane, and then in the Line Style pane, in the Width box, enter 1.5 pt. Also in the Format Picture dialog box, click Shadow in the left pane. In the Shadow pane, click the button next to Presets, and then under Outer click Offset Center (second row, second option from the left). On the slide, select the picture. On the Animations tab, in the Advanced Animation group, click Add Animation, and then under Entrance click Fade.Also on the Animations tab, in the Timing group, do the following:In the Start list, select With Previous.In the Duration list, select 1.00 seconds.Also on the Animations tab, in the Advanced Animation group, click Add Animation, and then under Motion Paths click Lines.Also on the Animations tab, in the Animation group, click Effect Options, and then click Right.Also on the Animations tab, in the Timing group, do the following:In the Start list, select With PreviousIn the Duration box, enter 10.00 seconds.On the slide, select the motion path. Press and hold SHIFT to constrain the path to a straight, horizontal line, and then drag the right adjustment handle to the right, stopping approximately 1.5” left of the right edge of the slide. (Note: On the View tab, in the Show/Hide group, select Ruler to measure approximately where the endpoint is on the slide.)To reproduce the other pictures on this slide, do the following:Select the picture. On the Home tab, in the Clipboard group, click the arrow to the right of Copy, and then click Duplicate. Repeat this process for a total of four duplicate pictures. Select a duplicate picture. Under Picture Tools, on the Format tab, in the Adjust group, click Change Picture. In the Insert Picture dialog box, select a new picture, and then click Insert. Under Picture Tools, on the Format tab, in the bottom right corner of the Size group, click the Size and Position dialog box launcherIn the Format Picture dialog box, resize or crop the picture as needed so that the height is set to 2” and the width is set to 2”. To crop the picture, click Crop in the left pane, and in the Crop pane, under Crop position, enter values into the Height, Width, Left, and Top boxes. To resize the picture, click Size in the left pane, and in the Size pane, under Size and rotate, enter values into the Height and Width boxes.Repeat steps 2-4 for the other duplicate pictures. To reproduce the other animation effects on this slide, do the following:On the Animations tab, in the Advanced Animation group, click Animation Pane.In the Animation Pane, select the third animation effect (fade effect for the second picture). On the Animations tab, in the Timing group, in the Delay box, enter 2.5. In the Animation Pane, select the fifth animation effect (fade effect for the third picture). On the Animations tab, in the Timing group, in the Delay box, enter 5. In the Animation Pane, select the seventh animation effect (fade effect for the fourth picture). On the Animations tab, in the Timing group, in the Delay box, enter 7.5. On the slide, press and hold SHIFT and select all four pictures. On the Home tab, in the Drawing group, click Arrange, point to Align, and then do the following:Click Align Selected Objects.Click Align Center. Click Align Middle. Drag the pictures into the top left corner of the slide. To reproduce the background effects on this slide, do the following:On the Home tab, in the Drawing group, click Shapes, and then under Rectangles click Rectangle (first option from the left). On the slide, drag to draw a rectangle. Select the rectangle. Under Drawing Tools, on the Format tab, in the Size group, do the following:In the Shape Height box, enter 3.42”.In the Shape Width box, enter 10”.Under DrawingTools, on the Format tab, in the Shape Styles group, click the Format Shape dialog box launcher. In the Format Shape dialog box, click Line Color in the left pane, in the LineColor pane, select No line. Also in the Format Shape dialog box, click Fill in the left pane, in the Fill pane, select Gradient fill, and then do the following:In the Type list, select Linear.Click the button next to Direction, and then click Linear Down (first row, second option from the left).Under Gradient stops, click Add gradient stops or Remove gradient stops until two stops appear in the drop-down list.Also under Gradient stops, customize the gradient stops that you added as follows:Select the first stop in the slider, and then do the following:In the Position box, enter 1%.Click the button next to Color, click More Colors, and then in the Colors dialog box, on the Custom tab, enter values for Red: 94, Green: 156, Blue: 198.In the Transparency box, enter 60%.Select the last stop in the slider, and then do the following: In the Position box, enter 100%.Click the button next to Color, click More Colors, and then in the Colors dialog box, on the Custom tab, enter values for Red: 94, Green: 156, Blue: 198.In the Transparency box, enter 90%.On the slide, drag the rectangle vertically to position it just above the middle of the slide. On the Home tab, in the Drawing group, click Arrange, and then do the following:Point to Align, and then click Align to Slide.Point to Align, and then click Align Center.Click Send to Back. Right-click the slide background area, and then click Format Background. In the Format Background dialog box, click Fill in the left pane, in the Fill pane, select Gradient fill,and then do the following:In the Type list, select Linear.Click the button next to Direction, and then click Linear Down (first row, second option from the left)In the Angle box, enter 90⁰.Under Gradient stops, click Add gradient stops or Remove gradient stops until two stops appear in the drop-down list.Also under Gradient stops, customize the gradient stops that you added as follows:Select the first stop in the slider, and then do the following:In the Position box, enter 70%.Click the button next to Color, and then click White, Background 1, Darker 5% (second row, first option from the left).Select the last stop in the slider, and then do the following: In the Position box, enter 100%.Click the button next to Color, and then click White, Background 1, Darker 25% (fourth row, first option from the left).