SlideShare uma empresa Scribd logo
1 de 62
Baixar para ler offline
4JB1-TC ENGINE
Mechanical Specification & Structure
Applicable To N*R
ISUZU MOTORS LIMITED
4JB1-TC Engine-1
OUTLINE
The four cycle direct injection 4JB1-TC engine features two valves per cylinder that are operated via a
single camshaft fitted to the engine block.
Auto-thematic pistons with cast steel struts are used to reduce thermal expansion and resulting engine
noise when the engine is cold.
Chrome plated dry type cylinder liners provide the highest durability.
The crankshaft has been tufftrided to provide a longer service life. Because the crankshaft is tufftrided, it
cannot be reground.
The 4JB1-TC engine is equipped with the VE type mechanical fuel injection pump made by Bosch
Engine Performance Curve
0
10
20
30
40
50
60
70
80
500 1000 1500 2000 2500 3000 3500 4000
Engine Speed (rpm)
Output
(kw)
0
50
100
150
200
250
Torque
(Nm)
4JB1-TC
Applicable Emission Euro 2
Maximum Output
70kw/3400rpm
(95PS/3400rpm)
Maximum Torque
206Nm/2000rpm
(21.0kgm/2000rpm)
ENGINE MAIN DATA & SPECIFICATION
General
Engine Model 4JB1-TC
Engine Type Diesel, Four Cycle, Overhead Valve, Water Cooled
Engine Weight (Kg)
(With Cooling Fan, Clutch Disc)
Approximately 256
Cylinder Layout - Number of Cylinders Inline-Four Cylinders
Fuel Injection Order 1-3-4-2
Bore x Stroke (mm) 93.0 x 102.0
Total Displacement (cc) 2771
Combustion Camber Type Direct Injection
Cylinder Liner Dry Type
Idle Speed (rpm) 750 ± 25
Fuel System
Injection Pump Type BOSCH Distributor VE Type
Governor Type Mechanical Variable All Speed
Injection Nozzle Type Hole Nozzle
Number of Injection Hole 5
Diameter of Injection Hole (mm) 0.20
1st Stage Injection Nozzle Operating Pressure
(Mpa)
19.5
2nd Stage Injection Nozzle Operating
Pressure (Mpa)
26.5
Fuel Filter Type Cartridge Paper Element and Water Separator
Valve System
Valve Layout Overhead Valve
Drive Type Gear Drive
Intake Valve Open At BTDC (deg) 24.5
Intake Valve Close At ABDC (deg) 55.5
Exhaust Valve Open At BBDC (deg) 54.0
Exhaust Valve Close At ATDC (deg) 26.0
Intake Valve Clearance At Cold (mm) 0.4
Exhaust Valve Clearance At Cold (mm) 0.4
Cooling System
Cooling Method Water Cooled
Water Capacity (Litters) (Including Radiator) 10
Water Pump Type Centrifugal
Water Pump Pulley Ratio (Crank / Pump) 1.2
Thermostat Type Wax Pellet With Jiggle Valve
Thermostat Initial Opening Temperature
(deg. C)
82
Thermostat Full Opening Temperature
(deg. C)
95
4JB1-TC Engine-2
Lubricating System
Lubricating Method Pressure Circulation
Oil Pump Type Gear
Oil Capacity (Litter) 6.6 - 7.1
Oil Filter Type Cartridge Paper Element
Starting System
Starter Motor Output (V-kW) 12 - 2.0 or 12 - 2.2
Charge System
Alternator Output (V-A) 12 - 50 or 12 - 60
Regulator Type IC
4JB1-TC Engine-3
4JB1-TC Engine-4
MAIN CONSTRUCTION PARTS
CYLINDER BLOCK
Cylinder Block
The cylinder block is a complex structure with cooling water and lubricating oil passages, and
crankshaft supports in the lower part. The cylinder block is made of cast iron because it has to be
strong enough to resist not only high temperatures, but also the high pressure gasses generated in
the cylinders. It also needs to have sufficient corrosion resistance to withstand these gasses.
The water cooled cylinder block can be divided into a one-piece cast type and a liner type. In the liner
type liners are inserted into the cylinder portion of the block. Furthermore, liners can be divided into a
dry type and a wet type according to the cooling method employed.
With the dry liner type, thin sleeve is pressed into place inside the cylinder. When worn, the liner can
be easily replaced. With dry liner type there is no possibility of cooling water leakage. When replacing
liners, it is necessary to measure the liners to make sure that the dimensions meet the requirement,
because heat conduction decreases is the liners do not closely fit the cylinder block.
With cylinder liners, the wear is greatest near the top of piston ring at top dead center, and the wear
decreases towards bottom dead center. This is due to piston slapping, side pressure, and thermal
expansion.
The sulfur contained in light oil is burnt to form SO2, part of which is oxidized into SO3. When the
water vapor in the burnt gas reaches the dew point, sulfuric acid is generated by the reaction (H2O +
SO3 = H2SO4). The carbon generated by combustion absorbs the sulfuric acid, and causes serious
chemical corrosion.
Cylinder Liner Grade Identification
4JB1-TC Engine-5
The 4JB1 engine employs chrome plated dry type cylinder liner. Marks are made on top of the cylinder
block to indicate the cylinder liner diameter.
This information is important when cylinder liners need to be replaced. The production line stamped
cylinder liner grade on the top of cylinder body, the cylinder liner outside diameter grade 1, 2, 3 and 4.
If you find cylinder liner outside diameter grade "1" on the cylinder body and piston outside diameter
"B" on the piston top or result of measurement of each parts, you will select service parts grade for
cylinder liner "1-AX" grade and piston "AX" grade.
Inspection Item
Cylinder Body Bore Measurement
Required Tool: Cylinder Indicator
Measure the point "A" across ①−① , ②−② , ③−③ and ④−④ .
Calculate the average value of the four measurements.
Service Standard: 95.001 - 95.040mm
Production
Line Use
Measurement in Service Service Parts
Liner
Outside
Grade
Cylinder Body Bore
Diameter Average
(mm)
Liner Outside
Diameter (mm)
Liner Grade
(Without Piston)
Liner Bore
Diameter (mm)
1 95.001 – 95.010 95.011 – 95.020 1-AX (For piston size AX) 93.035 – 93.050
1-CX (For piston size CX) 93.051 – 93.066
2 95.011 – 95.020 95.021 – 95.030 2-AX (For piston size AX) 93.035 – 93.050
2-CX (For piston size CX) 93.051 – 93.066
3 95.021 – 95.030 95.031 – 95.040 3-AX (For piston size AX) 93.035 – 93.050
3-CX (For piston size CX) 93.051 – 93.066
4 95.031 – 95.040 95.041 – 95.050 4-AX (For piston size AX) 93.035 – 93.050
4-CX (For piston size CX) 93.051 – 93.066
4JB1-TC Engine-6
Cylinder Liner Bore Measurement
Required Tool: Cylinder Indicator
Measure the point "A" across ②−② and ③−③ .
Calculate the average value of the two measurements.
Service Standard: 93.020 - 93.060mm
Cylinder Body Upper Face Warpage
Required Tool: Straight Edge, Feeler Gauge
Service Standard: 0.05mm or less
Service Limit: 0.20mm
Cylinder Liner Projection
Required Tool: Straight Edge, Feeler Gauge
Service Standard: 0 - 0.1mm
Service Limit: Between any two adjacent cylinders must not exceed 0.03mm
4JB1-TC Engine-7
PISTON, PISTON RING & CONNECTING ROD
1. Connecting Rod Bearing
2. Piston Ring
3. Piston Pin Snap Ring
4. Piston Pin
5. Connecting Rod
6. Piston
The 4JB1 engine accommodates the 4 pistons made of aluminum alloy. The pistons are exposed to
high temperature and high pressure gas during the explosion stroke. The gas pressure is conveyed to
the crankshaft, and most of the heat received is released to the cooling water via the cylinder walls.
During operation, the pistons must undergo continuous reciprocating motion at high speed along the
cylinder walls under side pressure, and at the same time maintain combustion pressure in the
combustion chambers. Thus, various factors, such as piston weight, thermal expansion, shape, and
dimensions, must be taken into account in designing the pistons.
With the offset piston, the piston pin center is offset a certain amount to the thrust side of the bore to
reduce side forces on the piston and this marks for reduced piston slapping noise.
1. Piston Ring Carrier
When the piston temperature rises, piston expansion will increase and this causes piston seizure or
ring sticking. Then ring groove wear will increase, and reduce the gas sealing performance. Therefore,
particularly, in the case of aluminum alloy pistons, a special cast iron ring carrier is cast into the top
ring groove which is exposed to a great heat load and this improves wear resistance of the ring
groove.
1
4JB1-TC Engine-8
1. Size Mark Identification
2. Front Mark
The piston diameter is essential information in case an engine is overhauled. A, B, C and D are the
marks used to identify the piston diameter. These marks can be found at the top of the piston.
Using the above diagram you can order the correct piston. The tolerance between the piston and the
cylinder liner is important to assemble the engine.
Note:
The cylinder liner installation procedure may result in slight decreases in cylinder liner clearances.
Always measure the cylinder liner clearance after installation to be sure that it is correct.
Size Mark Outside Diameter
(mm)
Service
Grade
Service Piston
Diameter (mm)
A 92.985 – 92.994 AX 92.989 – 93.004
B 92.995 – 93.004
C 93.005 – 93.014 CX 93.005 – 93.020
D 93.015 – 93.024
4JB1-TC Engine-9
1. First Compression Ring
2. Second Compression Ring
3. Oil Ring
The aluminum alloy pistons of 4JA1 engine have an integrated toroidal shaped combustion chamber
with centrally arranged swirl chambers.
Two piston rings guarantee a fast build up of air pressure and one oil ring prevents oil from the sump
entering the combustion chamber.
The piston rings are fitted into the ring grooves around the pistons to keep the combustion chamber
airtight between the piston and cylinder. They also conduct the heat received by the pistons to the
cylinder walls. The piston rings scrap off the oil sprayed on the cylinder walls to leave the minimum
required oil film to lubricate the pistons and piston rings, and prevent excess oil from entering the
combustion chambers.
The rings used mainly to maintain combustion pressure are called compression rings, and those used
for scraping off excess oil, are known as oil rings.
The compression rings alternately hit the top and bottom of the ring grooves as the pistons run up and
down. During the explosion stroke the high pressure gas pushes down the rings. This is the only time
they move ahead of the pistons. The compression rings also increase combustion pressure as the
high pressure gas pushes the rings towards the cylinder walls from behind the rings.
Oil rings are tapered or grooved on their sliding surface to increase unit pressure so that a close fit
with the cylinder walls can be maintained by their own tension. To meet demands for oil rings with
greater unit pressure suitable for high speed engine, oil ring with expander have come into general
use.
4JB1-TC Engine-10
Piston Cooling Jet
Four oil jets are placed under the pistons to cool the piston bottom. The jets are supplied with oil,
directly from the oil pump.
The piston bottom is special shaped to guide the oil along the entire surface to ensure a sufficient
cooling.
1. Piston Front Mark
2. Casting Mark
The connecting rod is a rod which connects a piston to the crankshaft, and transmits explosion forces
imposed on the piston, to the crankshaft. The connecting rod is made of forging metal to resist
compression, tension and bending forces.
One end of the connecting rod is connected to the piston with a piston pin, and is called the "small
end".
While the other end is called "big end" generally a bushing is press-fitted to the small end, however
the big end is divided into two pieces, and they are tightened to the crankshaft with bolts.
4JB1-TC Engine-11
Inspection Item
Piston Diameter & Piston Clearance Measurement
Required Tool: Micrometer
Measurement Point: 74mm
Grade A: 92.985 - 92.994mm
Grade B: 92.995 - 93.004mm
Grade A: 92.985 - 92.996mm
Grade A: 92.985 - 92.997mm
Piston Ring & Ring Groove Clearance
Required Tool: Feeler Gauge
Service Standard: 0.090 - 0.125mm (1st)
0.050 - 0.0750mm (2nd)
0.03 - 0.07mm (Oil)
Service Limit: 0.150mm
Piston Ring Gap
Required Tool: Feeler Gauge
Service Standard: 0.2 - 0.4mm (1st & 2nd) / 0.1 - 0.3mm (Oil)
Service Limit: 1.5mm
4JB1-TC Engine-12
Piston Pin Diameter
Required Tool: Micrometer
Service Standard: 30.995 - 31.000mm
Service Limit: 30.970mm
Piston Pin & Piston Clearance
Required Tool: Cylinder Indicator
Service Standard: 0.002 - 0.004mm
Service Limit: 0.04mm
Piston Pin & Connecting Rod Small End Bushing Clearance
Required Tool: Caliper Calibrator, Dial Indicator
Service Standard: 0.008 - 0.020mm
Service Limit: 0.050mm
Connecting Rod Alignment
Required Tool: Connecting Rod Aligner, Feeler Gauge
Service Standard: 0.08mm or Less (Bend) / 0.05mm or Less (Twist)
Service Limit: 0.20mm (Bend) / 0.15mm (Twist)
4JB1-TC Engine-13
Connecting Rod Thrust Clearance
Required Tool: Feeler Gauge
Service Standard: 0.23mm
Service Limit: 0.35mm
CRANKSHAFT
1. Crankshaft
2. Crankshaft Upper Bearing
3. Crankshaft Lower Bearing
4. Crankshaft Thrust Bearing
5. Crankshaft Bearing Cap
The crankshaft is the main shaft of the engine which takes the pressure of burnt gas generated during
engine operation at the crankshaft pins via the connecting rods, converts the power into rotary motion,
and transmits it to the outside.
The crankshaft balance relative to its axial center is maintained by adjusting the balance weights,
specially by drilling holes in them.
Note:
To increase crankshaft strength, tufftriding (nitrizing treatment) has been applied. Because of this, it is
not possible to regrind the crankshaft surfaces. Therefore, under size bearing are not available.
4JB1-TC Engine-14
Crankshaft Bearing Grade Mark Identification Crankshaft Journal Grade Identification
Inspection Item
Crankshaft Run-out
Required Tool: Dial Indicator
Service Standard: 0.05mm or Less
Service Limit: 0.08mm
Crankshaft & Crank Pin Diameter
Required Tool: Micrometer
Measure the point ③ , ④ across ①−① and ②−② .
Service Standard: 69.917 - 69.932mm (Crankshaft Journal)
52.915 - 52.930mm (Crank Pin)
0.05mm or Less (Uneven Wear)
Service Limit: 69.91mm (Crankshaft Journal)
52.90mm (Crank Pin)
0.08mm (Uneven Wear)
Main Bering Bore Diameter
(mm)
Crankshaft Main Journal
Diameter (mm)
Grade Main Bearing Bore
Diameter (mm)
Size
Mark
Outside Diameter
Crankshaft
Bering Size
Oil Clearance
(mm)
1 73.992 - 74.000 1 or 69.927 - 69.932 4 0.045 - 0.061
2 or 69.922 - 69.927 4 0.050 - 0.066
3 or 69.917 - 69.922 5 0.052 - 0.068
2 73.983 – 73.992 1 or 69.927 - 69.932 2 0.042 - 0.059
2 or 69.922 - 69.927 3 0.044 - 0.061
3 or 69.917 - 69.922 4 0.046 - 0.063
3 73.975 – 73.983 1 or 69.927 - 69.932 1 0.037 - 0.053
2 or 69.922 - 69.927 2 0.039 - 0.055
3 or 69.917 - 69.922 2 0.044 - 0.060
4JB1-TC Engine-15
Crankshaft Journal & Bearing Clearance
Required Tool: Cylinder Indicator
Service Standard: 0.035 - 0.080mm
Service Limit: 0.110mm
Connecting Rod Bearing Inside Diameter
Required Tool: Cylinder Indicator
Service Standard: 0.029 - 0.066mm
Service Limit: 0.100mm
4JB1-TC Engine-16
CYLINDER HEAD
1. Water By-pass Hose
2. Thermostat Housing
3. Cylinder Head Cover
4. Injection Nozzle & Nozzle Holder
5. Rocker Arm Shaft & Rocker Arm
6. Push Rod
7. Cylinder Head
8. Cylinder Head Gasket
The cylinder head is a vital component which forms the combustion chamber together with the
cylinder block and piston. It is fitted with a valve mechanism and injection nozzles.
The cylinder head is made of cast iron having great heat resistance and strength. It is exposed to
burnt gas at high temperatures, and therefore must be airtight against compression and explosion
pressures.
The exhaust valves and injection nozzles, in particular, have complex water cooling passages to cool
them uniformly since they are heated to high temperatures.
The cylinder head is mounted on the cylinder block with a gasket between them. Unless the mounting
bolts are tightened evenly in the proper order, problems such as burnt gas leakage and gasket
damage can result. Because the cylinder head is a casting, it can in some cases become distorted
over a long period. It is necessary, therefore, to check the flatness of its seating surface whether it is
removed or installed.
4JB1-TC Engine-17
When Loosening
Cylinder Head Bolts Torque
1st Step: 49Nm
2nd Step: 60 ° - 75 °
3rd Step: 60 ° - 75 ° When Tightening
Loosen the cylinder head bolts in numerical order a little at a time. They need to be checked for
cracks and damages when dismantled.
The cylinder head bolts are tightened according to the torque tightening method in numerical order.
A cylinder gasket has to seal the combustion gases, lubricant oil and cooling water at the same time.
The cylinder head gasket is of a metal 4 layer type of which the thickness can be identified even when
the cylinder head is assembled to the engine.
The thickness of the cylinder head gasket can be retrieved from three different marks that are located
under the intake manifold. In case of an overhaul of the engine the thickness of the cylinder head
gasket can be determined by measuring the piston projection.
Gasket Grade Mark Piston
Projection
Gasket
Thickness
(mm)
0.758 – 0.813 1.60
0.813 – 0.859 1.65
0.859 – 0.914 1.70
4JB1-TC Engine-18
Inspection Item
Cylinder Head Lower Face Warpage
Required Tool: Straight Edge, Feeler Gauge
Service Standard: 0.05mm or Less
Service Limit: 0.20mm
Maximum Grinding Allowance: 0.30mm
Cylinder Head Height
Required Tool: Height Gauge
Service Standard: 91.95 - 92.05mm
Service Limit: 91.55mm
Manifold Fitting Face Warpage
Required Tool: Straight Edge, Feeler Gauge
Service Standard: 0.05mm or Less
Service Limit: 0.20mm
Maximum Grinding Allowance: 0.40mm
Exhaust Manifold Warpage
Required Tool: Straight Edge, Feeler Gauge
Service Standard: 0.05mm or Less
Service Limit: 0.20mm
4JB1-TC Engine-19
VALVE MECHANISM
1. Camshaft Timing Gear
2. Camshaft Thrust Plate
3. Camshaft
1. Snap Ring
2. Rocker Arm
3. Rocker Arm Shaft Bracket
4. Rocker Arm
5. Spring
6. Snap Ring
7. Rocker Arm Shaft
The valve mechanism opens and closes the intake and exhaust valves at the correct moment to raise
intake and exhaust efficiency and assure satisfactory delivery of engine performance. The crankshaft
indirectly of engine performance. The crankshaft indirectly drives the camshaft through a gear. It
consists of a crank gear, idler gear, camshaft gear, camshaft, tappets, push rods, rocker arms, valves
and valve springs.
The camshaft has intake and exhaust cams for every cylinder.
Engine performance, involving valve opening and closing timing and firing order, depends particularly
on the cams. The rocker arm is a lever moving about the rocker arm shaft, and conveys the motion of
the push rod driven by the cam to open and close the valve. The purpose of the camshaft and rocker
arms is to open and close the intake and exhaust valves to control the combustion timing. If these
parts are worn or damaged, it will seriously affect engine performance.
4JB1-TC Engine-20
Valve timing means the valve opening and closing operation peculiar to an engine, and can be
expressed by the crankshaft rotary angle. The valves do not open and close exactly at top dead center
and bottom dead center because the intake air would not flow in immediately upon the opening of the
intake valve. There is some delay due to the fact that the intake air has a moment of inertia and that
the intake air passage area does not instantaneously increase. It follows, therefore, more air can be
drawn into the cylinder by opening the valve slightly before top dead center.
Air keeps flowing into the cylinder as long as there is a negative pressure, so the intake valve is
closed after the piston begins to rise from bottom dead center. The exhaust valve is opened before
bottom dead center to assure smooth discharge of exhaust gas, and closed after top dead center, as
the combustion chamber pressure is high.
It is known from the above description that there is a overlap period where both the intake and
exhaust valves are open near top dead center. This is to discharge the remaining burnt gas by the
intake of a fresh charge of air. This condition is known as valve overlap. The timing is controlled by the
camshaft.
Tappet
Tappets operate to convey the cam action to the valves through push rod and rocker arms. Tappets
have to withstand large forces these are the pressure of burnt gas, the tensile force of valve springs
and inertia force of moving parts.
Therefore, tappets are made of special cast iron, and the surface in contact with the cam is hardened
by a suitable heat treatment. Furthermore, the bottom surfaces of the tappet is machined to a
spherical surface to prevent the cam and tappet from deviating wear. To put is other way, each cam
and tappet are offset to turn the tappet during operation and this makes for even contact with each
other, and to improve the contact condition.
TDC BDC
26.0 degree
54.0 degree
TDCBDCTDC
24.5 degree 55.5degree
In-ValveEx-Valve
Valve
Lift
4JB1-TC Engine-21
Valve & Valve Spring
The purpose of the intake and exhaust valves is to assist passage of as much air and discharge gas
as possible in the very short time of a single cycle of this piston. In addition the valves prevent high
pressure gas leaking while in the are the closed position being able to open and close correctly
despite exposure to high temperature burnt gas. Further, they have to withstand operation over an
extended period.
The valves supported by valve guides, operate only in the vertical plane. The valve face is machined
to angle of 45° to seal the gas and convey heat to the valve seat when the valve is closed. The
valves are made of heat resistant steel because the intake valves have to withstand temperatures up
to about 400℃ and the exhaust valves operate in a temperature from 500℃ to 800℃.
The valve spring holds the valve to the valve seat while it is closed to keep the combustion chamber
airtight. Valve springs hold the working parts of the intake and exhaust valve mechanism to the cams
by spring tension while the valves are in motion, thereby correctly opening and closing the valve
according to the cam profile.
The valve spring is generally a combination of two coil springs, that is, an inner and outer, each having
a different tension value. This prevents valve surge during high speed engine operation.
If the valve spring end is suddenly compressed by the rocker arm, the spring is not uniformly
compressed, but is compressed from one end to the other. If this cycle is over-lapped with forced
vibration from the cam, the amplitude grows, and sever stress is partially applied, possibly causing
spring fatigue or breakage. This phenomenon is called valve spring surge.
This phenomenon alters the valve spring opening and closing position and can result in reduced
output power, increase noise, or in the worst case, breakage of the intake and exhaust valve
mechanism. This can be prevented by using double springs.
4JB1-TC Engine-22
Inspection Item
Rocker Arm Shaft Run-out
Required Tool: Dial Indicator, V-Block
Service Limit: 0.2mm
Rocker Arm Shaft Outside Diameter
Required Tool: Micrometer
Service Standard: 18.98 - 19.00mm
Service Limit: 18.90mm
Rocker Arm Inside Diameter
Required Tool: Caliper Calibrator, Dial Indicator
Service Standard: 19.010 - 19.030mm
0.01 - 0.05mm (Clearance)
Service Limit: 19.100mm
0.20mm (Clearance)
Camshaft End Play
Required Tool: Dial Indicator
Service Standard: 0.08mm
Service Limit: 0.20mm
Camshaft Run-out
Required Tool: Dial Indicator, V-Block
Service Standard: 0.02mm or Less
Service Limit: 0.10mm
4JB1-TC Engine-23
Camshaft Journal Diameter
Required Tool: Micrometer
Measure the point across 1 - 1 & 2 - 2
Service Standard: 49.945 - 49.975mm
Service Limit: 49.60mm
Cam Height
Required Tool: Micrometer
Service Standard: 42.016mm
Service Limit: 41.65mm
Camshaft Bearing Inside Diameter
Required Tool: Cylinder Indicator
Service Standard: 50.00 - 50.03mm
0.055mm (Camshaft Bearing Clearance)
Service Limit: 50.08mm
0.12mm (Camshaft Bearing Clearance)
Tappet Outside Diameter
Required Tool: Micrometer
Service Standard: 12.97 - 12.99mm
Service Limit: 12.95mm
Tappet & Cylinder Body Clearance
Required Tool: Cylinder Indicator
Service Standard: 0.03mm
Service Limit: 0.10mm
4JB1-TC Engine-24
Push Rod Curvature
Required Tool: Feeler Gauge
Service Limit: 0.4mm or Less
Valve Clearance
Required Tool: Feeler Gauge
Service Standard: 0.4mm (In & Ex)
Valve Stem & Valve Guide Clearance
Required Tool: Dial Indicator with Stand
Service Standard: 0.039 - 0.069mm (In) / 0.064 - 0.096mm (Ex)
Service Limit: 0.200mm (In) / 0.250mm (Ex)
Valve Stem Outside Diameter
Required Tool: Micrometer
Service Standard: 7.946 - 7.961mm (In) / 7.921 - 7.936mm (Ex)
Service Limit: 7.880mm (In) / 7.850mm (Ex)
Valve Thickness
Required Tool: Vernier Caliper
Service Standard: 1.79mm (In) / 1.83mm (Ex)
Service Limit: 1.50mm
4JB1-TC Engine-25
Valve Depression
Required Tool: Straight Edge, Depth Gauge
Service Standard: 0.73mm (In)/ 1.28mm (Ex)
Service Limit: 0.70mm (In)/ 1.20mm(Ex)
Valve Contact Width
Required Tool: Vernier Caliper
Service Standard: 1.7mm (In) / 2.0mm (Ex)
Service Limit: 2.2mm (In) / 2.5mm (Ex)
Valve Spring Free Height
Required Tool: Vernier Caliper
Service Standard: 48.0mm
Service Limit: 47.1mm
Valve Spring Squareness
Required Tool: Steel Square
Service Limit: 1.7mm
Valve Spring Tension
Required Tool: Spring Tester
Compressed Height: 38.9mm
Service Standard: 296.2N
Service Limit: 257.9N
4JB1-TC Engine-26
TIMING GEAR TRAIN
1. Crankshaft Gear
2. Idle Gear A
3. Camshaft Gear
4. Idle Gear B
5. Fuel Pump Gear
The 4JB1-TC engine used a gear type timing system. Benefits of a gear type timing system are;
-Stiff and compact construction
-Maintenance free
-Direct power drive
1. Timing Mark Crankshaft Gear "X-X" & Idle Gear A "X"
2. Timing Mark Camshaft Gear "Y-Y" & Idle Gear A "Y"
3. Timing Mark Idle Gear B "Z" & Idle Gear A "Z-Z"
The crankshaft gear (21 teeth) has a timing mark "X-X" that corresponds with a timing mark on the
idler gear A.
The idler gear A is a gear that transfers the rotating force to the idler gear B and camshaft gear. The
bearing is supplied with oil via the hollow shaft.
It has timing mark "Y" which correspond to timing mark on the camshaft gear, and "Z-Z" which
corresponded to timing mark on the idler gear B, and "X" which corresponded to timing mark on the
crankshaft gear.
The number of teeth of the idler gear A is 31 teeth.
4JB1-TC Engine-27
The idler gear B has timing marks "Z" which corresponded to timing marks on the idler gear A, and "V-
V" which corresponded to the fuel pump gear.
The number of teeth of the idler gear B is 37 teeth.
1. Timing Mark Idle Gear B "V-V" & Pump Gear "V"
The fuel pump gear is fixed to the fuel pump with a center bolt and positioned by a key to the fuel
pump shaft.
The fuel pump pulley has a timing mark "V" which corresponds to timing marks on idler gear B.
The fuel pump gear has 42 teeth.
4JB1-TC Engine-28
In case the gear case is removed, two or three different timing marks are visible on the gears.
To inspect or set the aligning of the timing gear, inspection holes are available in the timing case.
Under normal circumstances, a cover seals these inspection holes. When the covers are removed,
the second mark of the gear becomes visible. These marks are used for aligning timing related parts
that do not require disassembling of the timing case.
Please take in account that when timing gears are aligned using the timing gear marks shown in the
picture above, that you have to rotate the crankshaft to top dead center to check the timing through
the inspection holes.
Top dead center can be identified by the marks on the crankshaft pulley and the timing gear case.
42
21
31
37
42
4JB1-TC Engine-29
TURBOCHARGER
1. Turbocharger Specification Number
2. Production Serial Number
3. Isuzu Parts Number
A water-cooled turbocharger, with floating bearings, made by Ishikawajima-Harima Heavy Ind. Co.,
Ltd. is used. The 4JB1engine has RHF 4 type.
The turbocharger internal mechanism consists of the turbine wheel, the compressor wheel, and the
radial bearings. These parts are supported by the bearing housing.
The turbocharger external mechanism consists of the compressor housing air intake port and the
turbine housing air exhaust port.
The turbocharger increases air intake efficiency. This results in increased engine power, reduced fuel
consumption, and minimal engine noise.
The turbocharger operates at very high speeds and temperatures. Part materials have been carefully
selected and machined to extremely high precision.
Turbocharger servicing requires great care and expertise.
If reduced performance is noted, check the engine for damage or wear. If there is no apparent
engine damage or wear, trouble with the turbocharger is indicated.
Turbo Spec. 1
Serial No. RHF4H 2
Parts No. 3
4JB1-TC Engine-30
Inspection Item
Waste Gate Operating Pressure
Required Tool: Pressure Gauge
Service Standard: 105 - 113KPa (782 - 848mHg)
when the rod is moved to 2mm
Wheel Shaft End Play
Required Tool: Dial Indicator
Service Standard: 0.02 - 0.08mm
Service Limit: 0.09mm
Wheel Shaft & Bearing Clearance
Required Tool: Dial Indicator
Service Standard: 0.07 - 0.12mm
Service Limit: 0.16mm
4JB1-TC Engine-31
ENGINE LUBRICATION
LUBRICATION SYSTEM
1. Oil Pump Relief Valve Operating Pressure: 6.2 - 7.8kg/cm 2 (620 - 780Kpa)
2. Regulating Valve Operating Pressure: 5.7 - 6.3kg/cm 2 (570 - 630Kpa)
3. Oil Cooler Relief Valve Opening Pressure: 2.7 - 3.3kg/cm 2 (270 - 330Kpa)
4. Oil Filter Relief Valve Opening Pressure: 0.8 - 1.2kg/cm 2 (80 - 120Kpa)
5. Oil Pressure Switch Operating Pressure: 0.3 - 0.5kg/cm 2 (29.4 - 49.0Kpa)
6. Regulating Valve: 1.8 - 2.2kg/cm 2 (180 - 220Kpa)
Lubricating oil is pumped from the oil pump to the cylinder body oil gallery through the oil cooler
and oil filter. It is then delivered to the vital parts of the engine from the cylinder body oil gallery.
The engine has many sliding and rotating parts. These parts constantly generate friction, which
acts a frictional resistance. The process of forming an oil film to prevent direct contact of these
friction-causing parts, converting their friction into fluid friction, and thus minimizing frictional
resistance is called lubrication. The entire oil supply route is called a lubricating system.
Oil not only reduces friction between moving parts but cools, cleans, seals, prevents rusting, and
keeps dust out.
A forced circulation system which pressure-feeds oil from an oil pump is generally used. The
forced circulation lubrication system consists of an oil pan, oil pump, oil filter, oil cooler, and oil
gallery in the cylinder block.
Oil Pump
Oil Filter 4: Relief
Valve
3: Relief
Valve
Cylinder Body Oil Gallery
Warning
Lamp
Oil Cooler
Oil Filter & Cooler Assembly
Oil
Strainer
6: Regulating
Valve
Piston
Cooling Jet
Idler Gear
Shaft
Oil pipe
Connecting
Rod Bearing
Crankshaft
Bearing
Camshaft
Bearing
Rocker Arm
Shaft
Rocker Arm
Vacuum
Pump
Oil Pan
5: Oil Press.
SW
Turbo-charge
r
1: Relief
Valve
2: Regulating
Valve
Timing Gear
4JB1-TC Engine-32
OIL PUMP
1. Oil Pump Assembly
2. Pinion Gear
3. Gasket
4. Sprit Pin
5. Relief Valve Assembly
6. Oil Pump Body
7. Driven Gear
8. Drive Gear
9. Pump Cover
10. Oil Strainer
11. Oil Pipe
12.Gasket Oil Pipe
The oil pump is installed on the cylinder body by means of two bolts, and it is driven by the gear on the
camshaft to conduct oil in the oil pan to the parts to be lubricated.
1. Drive Gear (driven by the camshaft)
2. Driven Gear
The gear type oil pump is adopted to the 4JA1 engine.
The geared pump is structured as shown in the picture. The oil pump driven gear turns along the inner
surface of the housing together with the pump gear which is driven by the camshaft. As a result, a
negative pressure is created between the gears and the housing which draws the oil out of the oil pan
through a strainer (from A). The drawn oil is discharged along the housing (to B), and pressure-fed to
the oil gallery.
The efficiency of the geared pump varies with the clearance between the gears and housing, oil pipe
resistance, oil feed pressure, rpm and oil viscosity.
A
B
21
4JB1-TC Engine-33
Inspection Item
Gear Teeth & Body Inner Wall Clearance
Required Tool: Feeler Gauge
Service Standard: 0.14mm
Service Limit: 0.20mm
Gear & Body Clearance
Required Tool: Feeler Gauge, Steel Square
Service Standard: 0.06mm
Service Limit: 0.15mm
OIL FILTER & OIL COOLER
1. Oil Filter
2. Oil Cooler Relief Valve
3. Regulating Valve
Engine oil will slowly become contaminated by metal fragments produced by the friction of the working
and sliding parts of the engine, and by carbon and sludge generated by fuel combustion.
Heavy sediment will settle to the bottom of the oil pan, while particles in suspension will be fed with the
oil to engine parts, possibly causing accelerated wear and seizure.
It is for these reason that an oil filter is installed in the oil passage to remove such foreign particles.
The filter is either a full-flow type, which allows all the oil to pass through it, or a partial-flow type, which
allows only part of the oil to pass through. The full-flow type is used for 4JB1 engine.
A bypass valve is built into the oil filter. In case of filter element become clogged, the oil can be directly
fed to the oil gallery without going through the element. Thus safe lubrication of the system is
assumed.
1
2
3
4JB1-TC Engine-34
1. Engine Coolant Inlet Port
2. Engine Coolant Outlet Port
1. From Oil Pump
2. To Oil Pan
3. To Oil Galley
4. Regulating Valve
5. Oil Cooler Relief Valve
Lubricating oil for the most part often acts as a coolant for surfaces that are subject to severe friction.
When the temperature of lubricating oil exceeds 125 - 130 degree centigrade, its lubricating
performance, stable up to this temperature, suddenly drops, and it becomes difficult to maintain the oil
film. As a result, rotating and sliding parts may begin to stick.
Therefore, vehicles operated under severe conditions, that is, under extreme load at high speed for
extended periods, are equipped with an oil cooler to prevent the lubricating oil from overheating.
The plate tube type oil cooler allows lubricating oil to pass through the tube whose outer surfaces are
cooled by engine coolant.
1
2
2
3
4
5
1
4JB1-TC Engine-35
Inspection to determine if any clogging up of the oil cooler elements has occurred, when the oil cooler
unit is detached from the engine, pour oil or light oil into the oil cooler element through the inlet port,
and check to see that it flows away from the outlet port. However if the oil cooler unit is attached to the
engine, the following procedure is recommended;
1) Check oil gallery pressure at idling speed
If the oil cooler element is clogged up, the oil gallery pressure reading will be increased 1 to 2 kg/cm2
(100 - 200 Kpa) over the normal figure. This increased pressure is due to an oil pressure loss in the oil
cooler element.
2) Check the oil temperature in the oil gallery
If the oil cooler element is clogged up, the oil temperature in the oil gallery will be higher than normal.
If the engine operates at high speed, or is heavily loaded, the oil temperature will increase rapidly.
Inspection Item
Water Leakage
1. Submerge the oil cooler water passage.
2. Apply compressed air (200Kpa /2kg/cm2)
If air bubbles rise to the surface, there is water leakage.
4JB1-TC Engine-36
ENGINE COOLING
COOLING SYSTEM
1. Radiator Cap
2. Reservoir Tank
3. Cylinder Head
4. Radiator
5. Cooling Fan
6. Thermostat
7. Water Pump
8. Car Heater Unit
9. Oil Cooler
10. Cold Starting Device
11. Fuel Injection Pump
The engine cooling system consists of the radiator, the water pump, the cooling fan, and the
thermostat.
The heat generated by fuel combustion in the cylinder heats the component parts around the
combustion chambers of the engine. If these parts are not properly cooled, the inside engine
temperature rises sharply and overheats, thus reducing output power.
It also adversely affects the lubricating oil supplied to the moving parts of the engine, possibly reducing
lubrication performance, altering oil properties, or causing abnormal wear and seizure.
To quickly increase cold engine coolant temperature for smooth engine operation, the coolant is
circulated by the water pump and through the by-pass hose and back to the cylinder body. The coolant
does not circulate through the radiator.
Overcooling, on the other hand, can lower thermal efficiency and deteriorate combustion. It can also
accelerate cylinder liner wear as the sulfur dioxide generated in the combustion stroke is combined
with the water in the gas to form a corrosive substance.
The cooling system is designed to prevent engine overheating and overcooling, and maintain engine
operation at an appropriate temperature.
When the coolant temperature reaches specified value, the thermostat will begin to open and a
gradually increasing amount of coolant will circulate through the radiator.
The thermostat will be fully open when the coolant temperature reaches specified value. All of the
coolant is now circulating through the radiator for effective engine cooling.
4JB1-TC Engine-37
WATER PUMP
The water pump is a centrifugal impeller type and is driven by V type drive belt.
The water pump draws the coolant from the radiator, feeds it through the oil cooler into the cylinder
block to cool the outer surfaces of the cylinders, and then into the cylinder head.
The water in the cylinder head is directed by a water jet to cool the outer surfaces of the nozzle
holders and around the valve seats.
After cooling the cylinder head, the water runs through the water outlet pipe to the radiator.
The water outlet pipe has a thermostat to regulate the engine cooling water temperature.
If the cooling water temperature is below the valve operating temperature, the cooling water is fed
back through the water pump by-pass into the engine without returning to the radiator.
4JB1-TC Engine-38
THERMOSTAT
1. Jiggle Valve
The thermostat is a wax pellet type with a jiggle valve and has an opening temperature of 82°C - 95 °
C. The full opening valve lift is more than 10 mm.
The thermostat opens and closes the water outlet pipe and radiator water passage according to the
cooling water temperature to control it and prevent the engine from overheating or overcooling.
When the cooling water is cold immediately after starting the engine, the water passage is closed by
the valve, and the cooling water keeps circulating through the by-pass circuit without going through the
radiator, thus permitting speedy engine warm up. As the water temperature rises, the valve opens to
connect the water passage to the radiator and the by-pass circuit is closed so that the engine
temperature may be kept at an appropriate level.
If the engine becomes overcooled during operation, the water passage valve is automatically closed.
This thermostat has wax sealed inside its casing, and the valve opens or closes when the wax
expands or contracts, moving a spring. When the cooling water temperature is low, the wax is solid
and contracted so that the valve is closed under the pressure of the spring. When the water
temperature rises, the wax liquefies and expands to push the spring and valve down, to open the
valve.
A complete cut off of the cooling water to the radiator when the thermostat is fully closed will shorten
engine warm up time, but the system cannot be filled with cooling water because air will remain
trapped inside the engine. Therefore, the thermostat is generally fitted with a small air vent.
The jiggle valve releases the air while cooling water is being added, and closes when even the
slightest water pressure is applied as the engine start running, thereby preventing the cooling water
from flowing out.
Inspection Item
Thermostat Operating Temperature
Required Tool: Thermometer, Agitating Rod
Initial Opening Temperature: 82 ℃
Full Opening Temperature: 95 ℃
Valve Lift: 10mm
4JB1-TC Engine-39
COOLING FAN & FAN CLUTCH
1. Cooling Fan
2. Cooling Fan Clutch
3. Cooling Fan Pulley
4. Cooling Fan & Water Pump Drive Belt
5. Water Pump
The cooling fan consists of seven plastic blades and is fitted with a fan clutch of the fluid coupling type
filled with silicon oil.
The engine cooling capacity is designed to prevent engine overheating even at a high ambient
temperature. Thus, it is un-necessary for the fan to run fast when the engine is running fast at a low
ambient temperature. High speed operation of the fan increases noise and causes a marked power
loss. The fan clutch senses and drop in the ambient temperature and controls the fan speed.
4JB1-TC Engine-40
Inspection Item
Thermostat Operating Temperature
Required Tool: Thermistor, Heat Gun
Warm up the bimetal up to 80 deg. C.
If the fan clutch rotates more readily, silicone grease
is leaking internally.
Cooling Fan Drive Belt Deflection
Required Tool: Ruler
Apply a force of 98Nm (10kg) to the drive belt mid-portion.
Service Standard: 8 - 12 mm
4JB1-TC Engine-41
RADIATOR & RADIATOR CAP
1. Radiator
2. Intercooler
The radiator is a device for a large volume of water in close contact with a large volume of air so that
heat will transfer from the water to the air.
The radiator core is divided into two separate and intricate compartments; water passes through one,
and air passes through the other.
The radiator is a tube type with corrugated fins. The corrugated fin type also consists of a series of
long tubes extending from the top to bottom of the radiator.
While fins are placed between the tubes and have a corrugation shape. Radiation efficiency is great in
sprite of the same volume of the radiator, because of the corrugated fin has a great radiation area.
Furthermore the louver on the corrugated fin increases air speed and this makes for increased
radiation efficiency.
The radiator cap has a pressure valve, which is used to maintain the pressure in the radiator at
required level, and thus increases the capacity and cooling efficiency of the water pump. There is also
a vacuum valve to take fresh air from the out side if the radiator pressure is reduced when the engine
cools off, thereby protecting the radiator from collapse.
Inspection Item
Radiator Pressure Proof
Required Tool: Radiator Cap Tester
Testing Pressure: 147KPa (1.5kg/cm2)
Radiator Cap Pressure Proof
Required Tool: Radiator Cap Tester
Positive Pressure: 88.2 - 118KPa (0.9 - 1.2kg/cm2)
Negative Pressure: 1.0 - 3.9KPa (0.01 - 0.04kg/cm2)
4JB1-TC Engine-42
RESERVE TANK
The reserve tank is employed to prevent coolant loss, and to control the internal pressure of the
radiator tank, namely to ensure cooling efficiency. Generally, the coolant volume expands by about 5%
when the temperature exceeds 90℃, and expanded volume of coolant overflows from the radiator.
Therefore, the radiator has a suitable sized upper tank which corresponds to the increase in the
volume of coolant. This prevents coolant loss to a large degree. Vapor, on the other hand, is forced
out of the radiator.
When the coolant temperature in the radiator falls, for example when the engine is stopped, the
internal pressure in the radiator becomes negative which causes the coolant to be drawn back into the
radiator. Thus coolant loss is prevented, and the period between topping up the radiator is greatly
increased.
4JB1-TC Engine-43
FUEL SYSTEM
1. Overflow Pipe
2. Injection Nozzle
3. Fuel-cut Solenoid
4. Fuel Tank
5. Water Separator
6. Fuel Filter
The fuel system consists of the fuel tank, the water separator, the fuel filter, the injection pump, and
the injection nozzle.
The fuel in the fuel tank of a diesel engine is pumped up into a fuel filter by a feed pump, where water
and dust are removed from the fuel before fed to the injection pump.
The injection pump feeds the fuel at very high pressure through injection pipes, and injects it into the
combustion chambers of the engine through injection nozzles. The feed pump increase the fuel feed
rate in direct proportion to the engine speed, but the amount of fuel required to be injected into the
cylinders varies with vehicle running conditions, and not in direct proportion to engine speed. Thus,
there is always an excess of fuel from the feed pump. Therefore, the fuel return pipes run from the
nozzles and injection pump to the fuel tank via fuel filter to return the excess fuel to the fuel tank.
4JB1-TC Engine-44
FUEL INJECTION PUMP
FUEL DELIVERY
The drive shaft rotated by the engine timing belt or gear, rotates the cam disk through a cross
coupling. The cam disk’s press-fitted pin fits into a groove in the plunger to rotate the plunger. To
reciprocate the plunger, the cam disk is also equipped with raised face cams, arranged uniformly
around the circumference of the cam disk. The cam disk’s face cams are always in contact with the
roller holder assembly’s rollers because the cam disk and the plunger are press against the roller
holder assembly by the set force of the two plunger springs. Because of this plunger can follow cam
disk movement. Therefore, as the cam disk is rotated on the roller holder assembly by the drive shaft,
simultaneous plunger rotation and reciprocating movement is possible.
The roller assembly construction is such that it can only rotate in a certain angle range in accordance
with timer operation.
Because the plunger rotates and reciprocates simultaneously, suction of the fuel into the pressure
chamber, pressurization in the pressure chamber, delivery into the engine cylinder are possible.
4JB1-TC Engine-45
SPEED GOVERNOR
The governor is located in the upper part of the injection pump chamber. Four flyweights and a
governor sleeve are held in the flyweight holder, witch is mounted on the governor shaft.
The flyweight holder is rotated and accelerated by the drive shaft gear, through rubber dampers.
The governor lever assembly is supported by pivot bolts in the pump housing, and the ball joint at the
bottom of the lever assembly is inserted into the control sleeve, which slides over the outside surface
of the plunger. The top the lever assembly (the tension lever) is connected to the governor spring by a
retaining pin, while the opposite end of the governor spring is connected to the control lever shaft. The
control lever shaft is inserted into the governor cover and a control lever shaft. The accelerator pedal is
connected directly to the control lever by a cable, and the governor spring set force changes in
response to the control lever piston (i.e. accelerator pedal position).
Injection quantity control is governed by the mutually opposing forces of the flyweight centrifugal force
and the governor spring’s set force.
The flyweight centrifugal force, which changes in response to engine speed, acts on the governor
lever through the governor sleeve.
The governor spring’s set force, which is dependant on control lever position, i.e. accelerator pedal
position, acts on the governor lever through the retaining pin.
4JB1-TC Engine-46
INJECTION TIMING
In the lower part of the injection pump is the timer, in the centre of which the timer piston is positioned.
On the low pressure side of the timer piston is a timer spring with a predetermined set force; the pump
chamber fuel pressure acts on the opposite side (high pressure side). The timer piston position
changes in accordance with the balance of these two forces, to rotate the roller holder via the roller
holder pin. When the timer piston compresses the timer spring, the injection timing is advanced (the
roller holder rotates in the reverse rotation direction), and through timer piston movement in the
opposite direction the injection timing is retarded. Injection timing is controlled by the above.
FEED PUMP
The feed pump comprise a rotor, blades and liner.
Drive shaft rotation is transmitted through a key to the rotor to rotate the rotor.
The inside circumference of the liner is eccentric to the center of rotor rotation. Four blades are
installed in the rotor. Centrifugal force forces the blades outwards during rotation to contact the inside
surface of the liner and form four fuel chambers. Therefore, the volume of these four chambers
increases through rotor rotation to suck fuel from the fuel tank. Conversely, when the volume of these
four chambers decreases fuel is pressurized.
4JB1-TC Engine-47
REGULATING VALVE
Feed pump fuel delivery pressure increases proportionately with an increase in injection pump speed.
However, the total fuel injection quantity necessary for the engine is considerably less than that
delivered by the feed pump. Therefore, in order to prevent an excessive increase in the pump
chamber pressure caused by the excess fuel, and to adjust the pump chamber pressure so that it is
usually within the specified limit, a regulating valve is installed near the feed pump outlet. The timer
performs timing control using the pump chamber pressure, which is regulated by the regulating valve.
4JB1-TC Engine-48
FUEL INJECTION NOZZLE
The fuel is injected inside the combustion chamber by means of single stage injectors with five holes.
These holes have a diameter of 0.2mm.
-Desired Operating Pressure: 19.5 MPa (1st) / 26.5 MPa (2nd)
-Adjusting Operating Pressure: 20.0 - 21.0 MPa (1st) / 27.5 - 28.5 MPa (2nd)
This nozzle is following uniqe constructions.
The position is of the first and second springs are reversed, with the first spring located at the top.
The nozzle holder body is unified construction, decreasing the number of componenet parts.
Pre-lift is provided between the lift piece and the spring seat.
Pre-lift is adjusted at the factory. (Pre-lift is ensured through the assembly of the nozzle, spacer and lift
piece.
Full needle valve lift, second opening pressure and pre-lift can be measured simulanenously.
4JB1-TC Engine-49
1st Opening Pressure
The force of the high pressure fuel delivered by the injection pump acts to push the needle valve up.
When this force exceeds the set force of the first spring, the nozzle's needle valve pushes the first
pushrod up and the valve opens. (First opening pressure is repreasented by point E in the bottom left
hand picture, and point A in the bottom right picture.)
2nd Opening Pressure
When the first pushrod has been lifted through the pre-lift, it coantacts the second pushrod. As the set
force of the second spring is acting on the second pushrod, the combined forces of both the first spring
and the secoond spring then act on the needle valve, which will not lift unless these forces are
When the high pressure fuel (I.e. in-line pressure) overcomes the combined forces of the first and
secon springs, the needle valve is again lifted and main injection can begin. (Second opening
pressure is represented by point F in the bottom left picture and B - C in the bottom right picture.)
4JB1-TC Engine-50
INJECTION TIMING ADJUSTMENT
Align The No. 1 Cylinder to TDC
1) Rotate the crankshaft and bring the piston in the No.1 cylinder to TDC ① on the compression
stroke. Then, crankshaft pulley TDC line must be aligned with the timing mark ②.
Install The Timing Gauge to The Distributor Head
2) Disconnect the injection pipe from the injection pump and remove a bolt from the distributor head.
Insert a screw driver into a hole in the fast idle lever and turn the lever to canel the cold starting device
function.
3) Install the static timing gauge ③ to the distributor head.
Set The Timing Gauge to Zero
3) Rotate the crankshaft to bring the piston in the No.1 cylinder to a point 30 - 40°BTDC. And set the
timing gauge needle to zero.
4JB1-TC Engine-51
Timing Gauge Reading at 0.5mm Plunger Lift Point
4) Rotate the crankshaft clockwise and read the crankshaft timing pulley timing mark when the timing
gauge indicated 0.5mm lift point.
-Standard: BTDC 4°
Adjust Injection Timing to Standard
5) If the injection timing is out of standard, adjust the injection pump setting angle depending on
indicated timing.
4JB1-TC Engine-52
ELECTRICAL PARTS
STARTER MOTOR
Starter Assembly
Connecting Diagram
The starting system employs a magnetic type reduction starter in which the motor shaft is also used as
a pinion shaft.
When the starter switch is turned on, the contacts of magnetic switch are closed, and the armature
rotates.
At the same time, the plunger is attracted, and the pinion is pushed forward by the shift lever to mesh
with ring gear. Then, the ring gear runs to start the engine.
On the 4JB1-TC engine has an output of 2.0 or 2.2 kW made by Hitach.
4JB1-TC Engine-53
1. Magnetic Switch Assembly
2. Magnetic Switch
3. Adjusting Shims
4. Plunger
5. Torsion Spring
6. Shift Lever
7. Gear Case
8. Dust Cover
9. Bolt
10. Pinion Assembly
11. Clutch
12. Pinion Shaft
13. Return Spring
14. Pinion Stopper
15. Pinion Stopper Clip
16. Bearing Retainer
17. Screw
18. Motor Assembly
19. Armature
20. Yoke
21. Brush Holder
22. Rear Cover
23. Screw
24. Through Bolt
25. Lead Wire
4JB1-TC Engine-54
Inspection Item
Commutator Run-out
Required Tool: Dial Indicator, V-Block
Service Standard: 0.02mm
Service Limit: 0.05mm
Commutator Mica Segments Wear
Required Tool: Vernier Caliper
Service Standard: 0.7 - 0.9mm
Service Limit: 0.2mm
Commutator Outside Diameter
Required Tool: Vernier Caliper
Service Standard: 35mm
Service Limit: 34mm
Armature Grounding Test
Required Tool: Circuit Tester
Hold one probe of the circuit tester against the commutator
segment. And, hold the other circuit tester probe
against the armature core.
If the circuit tester indicates continuity, the armature is grounded.
Armature Continuity Test
Required Tool: Circuit Tester
1 Hold the circuit tester probes against two armature core segments.
2 Repeat Step 1 at different segments of the armature core.
There should be continuity between all segments of the armature core.
4JB1-TC Engine-55
Yoke Field Winding Ground Test
Required Tool: Circuit Tester
Hold one circuit tester probe against the field winding end or brush.
Hold the other circuit tester probe against the bare surface of the yoke body.
If there is continuity, the field coil is grounded.
Yoke Field Winding Continuity Test
Required Tool: Circuit Tester
Hold one circuit tester probe against the “C” terminal lead wire.
Hold the other circuit tester probe against the field winding brush.
There should be continuity.
Brush Length
Required Tool: Vernier Caliper
Service Standard: 16.0mm (2.0kw) or 14.5mm (2.2kw)
Service Limit: 10.0mm
Brush Holder Insulation Test
Required Tool: Circuit Tester
Touch one probe to the holder plate and the other probe
to the positive brush holder.
There should be no continuity.
Overrunning Clutch
Inspect the overrunning clutch gear teeth for excessive wear and damage.
Rotate the pinion clockwise. It should turn smoothly.
Try to rotate the pinion in the opposite direction. The pinion should lock.
4JB1-TC Engine-56
GENERATOR
Generator Assembly
Connecting Diagram
The basic charging system is the IC integral regulator charging system. The internal components are
connected electrically as shown in connecting diagram.
The generator features a solid state regulator that is mounted inside the generator. All regulator
components are enclosed into a solid mold, and this unit along with the brush holder assembly is
attached to the slip ring end frame.
On the 4JB1-TC engine, two type of outputs (50A or 60A) can be used depends on vehicle
specification.
4JB1-TC Engine-57
1. Vacuum Pump
2. Cover
3. Brush
4. Through Bolt
5. Pulley Assembly
6. Pulley Nut
7. Pulley
8. Fan
9. Rotor Assembly
10. Speacer
11. Ball Bearing
12 Rotor
13. Front Cover Assembly
14. Front Cover
15. Ball Bearing
16. Bearing Retainer
17. Screw
18. Terminal Bolt & Nut
19. Condenser
20. Rear Cover
21. Stator
22. Diode
23. Holder Plate
24. Brush Holder
25. IC Regulator Assembly
26. Lead Wire
27. Mold Terminal
28. IC Regulator
Inspection Item
Rotor Slip Ring Wear
Required Tool: Vernier Caliper
Check the rotor slip ring surfaces for contamination and
roughness. If rough, polish with #500-600 sandpaper.
Service Standard: 34.6mm
Service Limit: 33.6mm
Rotor Slip Ring Continuity Test
Required Tool: Circuit Tester
Check for continuity between slip rings.
There should be continuity.
4JB1-TC Engine-58
Rotor Slip Ring Insulation Test
Required Tool: Circuit Tester
Check for continuity between the slip rings and the rotor core or shaft.
There should be no continuity.
Stator Coil Continuity Test
Required Tool: Circuit Tester
Check for continuity across the stator coils.
There should be continuity.
Stator Coil Insulation Test
Required Tool: Circuit Tester
Check for continuity between each stator coils and the stator core.
There should be no continuity.
Brush Length
Required Tool: Vernier Caliper
Service Standard: 20mm
Service Limit: 6mm
Diode Insulation Test
Required Tool: Circuit Tester
Check for continuity between the battery and each of the three
stator coil lead terminals. If there is continuity, the diode is normal.
Reverse the polarity of the test probes. If there is no continuity,
the diode is normal.
5-8840-0200-0
Oil Filter Wrench (89.0mm / 3.5 in)
9-8523-1423-0
Valve Spring Compressor
5-8840-2033-0
Oil Seal Installer
5-8840-9018-0
Piston Ring Compressor
9-8523-1212-0
Valve Guide Replacer
5-8840-2036-0
Front Oil Seal Installer
5-8840-2675-0
Compression Gauge
4JB1-TC Engine-59
SPECIAL TOOLS
5-8531-7001-0
Gauge Adapter
5-8840-0266-0
Angle Gauge
5-8840-2038-0
Camshaft Bering Replacer
5-8840-2360-0
Rear Oil Seal Remover
5-8840-2359-0
Rear Oil Seal Installer
5-8840-2040-0
Cylinder Liner Installer
5-8840-2039-0
Cylinder Liner Remover
4JB1-TC Engine-60
5-8840-2000-0
Pilot Bearing Remover
5-8840-0019-0
Sliding Hammer
5-8522-0024-0
Pilot Bearing Installer
4JB1-TC Engine-61

Mais conteúdo relacionado

Mais procurados

Mahle metal leve catalogo de válvulas,guias e sedes de valvulas 2015 2016
Mahle metal leve catalogo de válvulas,guias e sedes de valvulas 2015 2016Mahle metal leve catalogo de válvulas,guias e sedes de valvulas 2015 2016
Mahle metal leve catalogo de válvulas,guias e sedes de valvulas 2015 2016LEODECIO BELO OLIVEIRA
 
Manual de especificaciones tecnicas automotriz garanti
Manual de especificaciones tecnicas automotriz garantiManual de especificaciones tecnicas automotriz garanti
Manual de especificaciones tecnicas automotriz garantiluisRamrezVzquez
 
Denso hp-3 servis manual
Denso hp-3 servis manualDenso hp-3 servis manual
Denso hp-3 servis manualViktor
 
Manual Granite GU.pdf
Manual Granite GU.pdfManual Granite GU.pdf
Manual Granite GU.pdfviajerodz
 
Volvo ec210 c ld ec210cld excavator service repair manual
Volvo ec210 c ld ec210cld excavator service repair manualVolvo ec210 c ld ec210cld excavator service repair manual
Volvo ec210 c ld ec210cld excavator service repair manualfjjsekksekmm
 
2001 hino fd series truck service repair manual
2001 hino fd series truck service repair manual2001 hino fd series truck service repair manual
2001 hino fd series truck service repair manualfusjejfkskeme
 
Manual de serviço xlx250 r informac
Manual de serviço xlx250 r informacManual de serviço xlx250 r informac
Manual de serviço xlx250 r informacThiago Huari
 
Bosch catálogo diesel injeção eletronico 2016
Bosch catálogo diesel injeção eletronico 2016Bosch catálogo diesel injeção eletronico 2016
Bosch catálogo diesel injeção eletronico 2016LEODECIO BELO OLIVEIRA
 
Manual de serviço cg125 titan ks es cg125 cargo infgeral
Manual de serviço cg125 titan ks es cg125 cargo infgeralManual de serviço cg125 titan ks es cg125 cargo infgeral
Manual de serviço cg125 titan ks es cg125 cargo infgeralThiago Huari
 
MANUAL DO MOTOR MWM SPRINT 4.07 6.07
MANUAL DO MOTOR MWM SPRINT 4.07 6.07MANUAL DO MOTOR MWM SPRINT 4.07 6.07
MANUAL DO MOTOR MWM SPRINT 4.07 6.07Elson Dorigon
 
Manual serviço cbr450 sr (1989) msmr4891p cbr450sr
Manual serviço cbr450 sr (1989)   msmr4891p cbr450srManual serviço cbr450 sr (1989)   msmr4891p cbr450sr
Manual serviço cbr450 sr (1989) msmr4891p cbr450srThiago Huari
 
Toyota ABS-braking-systems
Toyota ABS-braking-systemsToyota ABS-braking-systems
Toyota ABS-braking-systemsCharith Ruckshan
 
Hyundai D4DD engine manual
Hyundai D4DD engine manualHyundai D4DD engine manual
Hyundai D4DD engine manualViktor
 
Car service-repair-manuals
Car service-repair-manualsCar service-repair-manuals
Car service-repair-manualsMdAlAmin332
 

Mais procurados (20)

Tabela de parede linha diesel
Tabela de parede linha dieselTabela de parede linha diesel
Tabela de parede linha diesel
 
Manual de Armado Motor DIESSEL.pdf
Manual de Armado  Motor DIESSEL.pdfManual de Armado  Motor DIESSEL.pdf
Manual de Armado Motor DIESSEL.pdf
 
Mahle metal leve catalogo de válvulas,guias e sedes de valvulas 2015 2016
Mahle metal leve catalogo de válvulas,guias e sedes de valvulas 2015 2016Mahle metal leve catalogo de válvulas,guias e sedes de valvulas 2015 2016
Mahle metal leve catalogo de válvulas,guias e sedes de valvulas 2015 2016
 
Manual de especificaciones tecnicas automotriz garanti
Manual de especificaciones tecnicas automotriz garantiManual de especificaciones tecnicas automotriz garanti
Manual de especificaciones tecnicas automotriz garanti
 
Denso hp-3 servis manual
Denso hp-3 servis manualDenso hp-3 servis manual
Denso hp-3 servis manual
 
Manual Granite GU.pdf
Manual Granite GU.pdfManual Granite GU.pdf
Manual Granite GU.pdf
 
Volvo ec210 c ld ec210cld excavator service repair manual
Volvo ec210 c ld ec210cld excavator service repair manualVolvo ec210 c ld ec210cld excavator service repair manual
Volvo ec210 c ld ec210cld excavator service repair manual
 
Curso et caterpillar
Curso et caterpillarCurso et caterpillar
Curso et caterpillar
 
2001 hino fd series truck service repair manual
2001 hino fd series truck service repair manual2001 hino fd series truck service repair manual
2001 hino fd series truck service repair manual
 
Manual de serviço xlx250 r informac
Manual de serviço xlx250 r informacManual de serviço xlx250 r informac
Manual de serviço xlx250 r informac
 
Manuals
ManualsManuals
Manuals
 
Motor Scania DC 12
Motor Scania DC 12 Motor Scania DC 12
Motor Scania DC 12
 
70 c17 3.0 16v_euro5
70 c17 3.0 16v_euro570 c17 3.0 16v_euro5
70 c17 3.0 16v_euro5
 
Bosch catálogo diesel injeção eletronico 2016
Bosch catálogo diesel injeção eletronico 2016Bosch catálogo diesel injeção eletronico 2016
Bosch catálogo diesel injeção eletronico 2016
 
Manual de serviço cg125 titan ks es cg125 cargo infgeral
Manual de serviço cg125 titan ks es cg125 cargo infgeralManual de serviço cg125 titan ks es cg125 cargo infgeral
Manual de serviço cg125 titan ks es cg125 cargo infgeral
 
MANUAL DO MOTOR MWM SPRINT 4.07 6.07
MANUAL DO MOTOR MWM SPRINT 4.07 6.07MANUAL DO MOTOR MWM SPRINT 4.07 6.07
MANUAL DO MOTOR MWM SPRINT 4.07 6.07
 
Manual serviço cbr450 sr (1989) msmr4891p cbr450sr
Manual serviço cbr450 sr (1989)   msmr4891p cbr450srManual serviço cbr450 sr (1989)   msmr4891p cbr450sr
Manual serviço cbr450 sr (1989) msmr4891p cbr450sr
 
Toyota ABS-braking-systems
Toyota ABS-braking-systemsToyota ABS-braking-systems
Toyota ABS-braking-systems
 
Hyundai D4DD engine manual
Hyundai D4DD engine manualHyundai D4DD engine manual
Hyundai D4DD engine manual
 
Car service-repair-manuals
Car service-repair-manualsCar service-repair-manuals
Car service-repair-manuals
 

Destaque

4 jh1+gestión+electrónica
4 jh1+gestión+electrónica4 jh1+gestión+electrónica
4 jh1+gestión+electrónicacarlos malvacia
 
Isuzu trooper 20workshop_20manual
Isuzu trooper 20workshop_20manualIsuzu trooper 20workshop_20manual
Isuzu trooper 20workshop_20manualbiggwallyy
 
Glosario de términos botánicos
Glosario de términos botánicosGlosario de términos botánicos
Glosario de términos botánicosGastón Jara Masson
 
Auto Crankshaft catalogue with various models
Auto Crankshaft catalogue with various modelsAuto Crankshaft catalogue with various models
Auto Crankshaft catalogue with various models芹 张
 
DIRECTORY OF AUTOMOBILE WORDS
DIRECTORY OF AUTOMOBILE WORDS DIRECTORY OF AUTOMOBILE WORDS
DIRECTORY OF AUTOMOBILE WORDS Devendra Hembade
 
Liste euro3
Liste euro3Liste euro3
Liste euro3ognjen24
 
Nissan qd32 engine_service_manual
Nissan qd32 engine_service_manualNissan qd32 engine_service_manual
Nissan qd32 engine_service_manualJuan Paleo Rivera
 
4 m41+manual
4 m41+manual4 m41+manual
4 m41+manualtony1747
 
Manual e plano Zexel Covec F VRZ
Manual e plano Zexel Covec F VRZ Manual e plano Zexel Covec F VRZ
Manual e plano Zexel Covec F VRZ Junior Iung
 
Tabela de altura de cabeçotes
Tabela de altura de cabeçotesTabela de altura de cabeçotes
Tabela de altura de cabeçotesFrancisco Rocha
 
Ford Focus 1 l EcoBoost Presentation
Ford Focus 1 l EcoBoost PresentationFord Focus 1 l EcoBoost Presentation
Ford Focus 1 l EcoBoost PresentationSven Wiesner
 
Air conditioning system (automotive)
Air conditioning system (automotive)Air conditioning system (automotive)
Air conditioning system (automotive)Abo-Nasser Al-Yahri
 
Torques diesel
Torques dieselTorques diesel
Torques dieselgljr32941
 
Support cours moteur thermique
Support cours moteur thermiqueSupport cours moteur thermique
Support cours moteur thermiqueessaies
 

Destaque (20)

Manual de Isuzu trooper
Manual de Isuzu trooperManual de Isuzu trooper
Manual de Isuzu trooper
 
4 jh1+gestión+electrónica
4 jh1+gestión+electrónica4 jh1+gestión+electrónica
4 jh1+gestión+electrónica
 
Isuzu trooper 20workshop_20manual
Isuzu trooper 20workshop_20manualIsuzu trooper 20workshop_20manual
Isuzu trooper 20workshop_20manual
 
Nissan diesel engines_sd22_sd23_sd25_sd33
Nissan diesel engines_sd22_sd23_sd25_sd33Nissan diesel engines_sd22_sd23_sd25_sd33
Nissan diesel engines_sd22_sd23_sd25_sd33
 
Glosario de términos botánicos
Glosario de términos botánicosGlosario de términos botánicos
Glosario de términos botánicos
 
Auto Crankshaft catalogue with various models
Auto Crankshaft catalogue with various modelsAuto Crankshaft catalogue with various models
Auto Crankshaft catalogue with various models
 
Glosario de botánica y fisiología
Glosario de botánica y fisiologíaGlosario de botánica y fisiología
Glosario de botánica y fisiología
 
DIRECTORY OF AUTOMOBILE WORDS
DIRECTORY OF AUTOMOBILE WORDS DIRECTORY OF AUTOMOBILE WORDS
DIRECTORY OF AUTOMOBILE WORDS
 
Report_Honda
Report_HondaReport_Honda
Report_Honda
 
Liste euro3
Liste euro3Liste euro3
Liste euro3
 
Nissan qd32 engine_service_manual
Nissan qd32 engine_service_manualNissan qd32 engine_service_manual
Nissan qd32 engine_service_manual
 
4 m41+manual
4 m41+manual4 m41+manual
4 m41+manual
 
Tablas de torque.pdf 2
Tablas de torque.pdf 2Tablas de torque.pdf 2
Tablas de torque.pdf 2
 
Manual e plano Zexel Covec F VRZ
Manual e plano Zexel Covec F VRZ Manual e plano Zexel Covec F VRZ
Manual e plano Zexel Covec F VRZ
 
Tabela de altura de cabeçotes
Tabela de altura de cabeçotesTabela de altura de cabeçotes
Tabela de altura de cabeçotes
 
Ford Focus 1 l EcoBoost Presentation
Ford Focus 1 l EcoBoost PresentationFord Focus 1 l EcoBoost Presentation
Ford Focus 1 l EcoBoost Presentation
 
L'injection
L'injectionL'injection
L'injection
 
Air conditioning system (automotive)
Air conditioning system (automotive)Air conditioning system (automotive)
Air conditioning system (automotive)
 
Torques diesel
Torques dieselTorques diesel
Torques diesel
 
Support cours moteur thermique
Support cours moteur thermiqueSupport cours moteur thermique
Support cours moteur thermique
 

Semelhante a Plugin nkr 4-jb1

Kubota b5200 tractor service repair manual
Kubota b5200 tractor service repair manualKubota b5200 tractor service repair manual
Kubota b5200 tractor service repair manualfjjskdmnenemm
 
Volvo EC140B LCM EC140BLCM Excavator Service Repair Manual Instant Download.pdf
Volvo EC140B LCM EC140BLCM Excavator Service Repair Manual Instant Download.pdfVolvo EC140B LCM EC140BLCM Excavator Service Repair Manual Instant Download.pdf
Volvo EC140B LCM EC140BLCM Excavator Service Repair Manual Instant Download.pdfdai20nao
 
Volvo EC140B LCM EC140BLCM Excavator Service Repair Manual Instant Download.pdf
Volvo EC140B LCM EC140BLCM Excavator Service Repair Manual Instant Download.pdfVolvo EC140B LCM EC140BLCM Excavator Service Repair Manual Instant Download.pdf
Volvo EC140B LCM EC140BLCM Excavator Service Repair Manual Instant Download.pdftepu22753653
 
Volvo EC140B LCM EC140BLCM Excavator Service Repair Manual Instant Download.pdf
Volvo EC140B LCM EC140BLCM Excavator Service Repair Manual Instant Download.pdfVolvo EC140B LCM EC140BLCM Excavator Service Repair Manual Instant Download.pdf
Volvo EC140B LCM EC140BLCM Excavator Service Repair Manual Instant Download.pdfzu0582kui
 
Volvo EC140B LCM EC140BLCM Excavator Service Repair Manual Instant Download.pdf
Volvo EC140B LCM EC140BLCM Excavator Service Repair Manual Instant Download.pdfVolvo EC140B LCM EC140BLCM Excavator Service Repair Manual Instant Download.pdf
Volvo EC140B LCM EC140BLCM Excavator Service Repair Manual Instant Download.pdffijsekkkdmdm3e
 
Volvo EC140B LCM EC140BLCM Excavator Service Repair Manual Instant Download.pdf
Volvo EC140B LCM EC140BLCM Excavator Service Repair Manual Instant Download.pdfVolvo EC140B LCM EC140BLCM Excavator Service Repair Manual Instant Download.pdf
Volvo EC140B LCM EC140BLCM Excavator Service Repair Manual Instant Download.pdflunrizan628
 
Volvo EC140B LCM EC140BLCM Excavator Service Repair Manual Instant Download.pdf
Volvo EC140B LCM EC140BLCM Excavator Service Repair Manual Instant Download.pdfVolvo EC140B LCM EC140BLCM Excavator Service Repair Manual Instant Download.pdf
Volvo EC140B LCM EC140BLCM Excavator Service Repair Manual Instant Download.pdfnie7140zhuang
 
Volvo EC140B LCM EC140BLCM Excavator Service Repair Manual Instant Download.pdf
Volvo EC140B LCM EC140BLCM Excavator Service Repair Manual Instant Download.pdfVolvo EC140B LCM EC140BLCM Excavator Service Repair Manual Instant Download.pdf
Volvo EC140B LCM EC140BLCM Excavator Service Repair Manual Instant Download.pdffapanhe306271
 
Volvo EC140B LCM EC140BLCM Excavator Service Repair Manual Instant Download.pdf
Volvo EC140B LCM EC140BLCM Excavator Service Repair Manual Instant Download.pdfVolvo EC140B LCM EC140BLCM Excavator Service Repair Manual Instant Download.pdf
Volvo EC140B LCM EC140BLCM Excavator Service Repair Manual Instant Download.pdff8iosedkdm3e
 
Volvo EC140B LCM EC140BLCM Excavator Service Repair Manual Instant Download.pdf
Volvo EC140B LCM EC140BLCM Excavator Service Repair Manual Instant Download.pdfVolvo EC140B LCM EC140BLCM Excavator Service Repair Manual Instant Download.pdf
Volvo EC140B LCM EC140BLCM Excavator Service Repair Manual Instant Download.pdfrou774513po
 
Volvo EC140B LCM EC140BLCM Excavator Service Repair Manual Instant Download.pdf
Volvo EC140B LCM EC140BLCM Excavator Service Repair Manual Instant Download.pdfVolvo EC140B LCM EC140BLCM Excavator Service Repair Manual Instant Download.pdf
Volvo EC140B LCM EC140BLCM Excavator Service Repair Manual Instant Download.pdfzhenchun51
 
Kubota b7200 tractor service repair manual
Kubota b7200 tractor service repair manualKubota b7200 tractor service repair manual
Kubota b7200 tractor service repair manualfjkskekxsdcmdmme
 
Kubota b7200 hst tractor service repair manual
Kubota b7200 hst tractor service repair manualKubota b7200 hst tractor service repair manual
Kubota b7200 hst tractor service repair manualfjkskekxsdcmdmme
 
Parts bearings gearing
Parts  bearings  gearingParts  bearings  gearing
Parts bearings gearingRebel Munna
 
Cummins Engine ISBe Block or Mechanical .ppt
Cummins Engine ISBe Block or Mechanical .pptCummins Engine ISBe Block or Mechanical .ppt
Cummins Engine ISBe Block or Mechanical .pptTeckYongKeng1
 
Volvo EC140B LC EC140BLC Excavator Service Repair Manual Instant Download.pdf
Volvo EC140B LC EC140BLC Excavator Service Repair Manual Instant Download.pdfVolvo EC140B LC EC140BLC Excavator Service Repair Manual Instant Download.pdf
Volvo EC140B LC EC140BLC Excavator Service Repair Manual Instant Download.pdfdai20nao
 
Volvo EC140B LC EC140BLC Excavator Service Repair Manual Instant Download.pdf
Volvo EC140B LC EC140BLC Excavator Service Repair Manual Instant Download.pdfVolvo EC140B LC EC140BLC Excavator Service Repair Manual Instant Download.pdf
Volvo EC140B LC EC140BLC Excavator Service Repair Manual Instant Download.pdftepu22753653
 
Volvo EC140B LC EC140BLC Excavator Service Repair Manual Instant Download.pdf
Volvo EC140B LC EC140BLC Excavator Service Repair Manual Instant Download.pdfVolvo EC140B LC EC140BLC Excavator Service Repair Manual Instant Download.pdf
Volvo EC140B LC EC140BLC Excavator Service Repair Manual Instant Download.pdfzu0582kui
 

Semelhante a Plugin nkr 4-jb1 (20)

Kubota b5200 tractor service repair manual
Kubota b5200 tractor service repair manualKubota b5200 tractor service repair manual
Kubota b5200 tractor service repair manual
 
Volvo EC140B LCM EC140BLCM Excavator Service Repair Manual Instant Download.pdf
Volvo EC140B LCM EC140BLCM Excavator Service Repair Manual Instant Download.pdfVolvo EC140B LCM EC140BLCM Excavator Service Repair Manual Instant Download.pdf
Volvo EC140B LCM EC140BLCM Excavator Service Repair Manual Instant Download.pdf
 
Volvo EC140B LCM EC140BLCM Excavator Service Repair Manual Instant Download.pdf
Volvo EC140B LCM EC140BLCM Excavator Service Repair Manual Instant Download.pdfVolvo EC140B LCM EC140BLCM Excavator Service Repair Manual Instant Download.pdf
Volvo EC140B LCM EC140BLCM Excavator Service Repair Manual Instant Download.pdf
 
Kubota b7200 tractor service repair manual
Kubota b7200 tractor service repair manualKubota b7200 tractor service repair manual
Kubota b7200 tractor service repair manual
 
Kubota b7200 hst tractor service repair manual
Kubota b7200 hst tractor service repair manualKubota b7200 hst tractor service repair manual
Kubota b7200 hst tractor service repair manual
 
Recipteng3
Recipteng3Recipteng3
Recipteng3
 
Reciptengcomp3
Reciptengcomp3Reciptengcomp3
Reciptengcomp3
 
Parts bearings gearing
Parts  bearings  gearingParts  bearings  gearing
Parts bearings gearing
 
Cummins Engine ISBe Block or Mechanical .ppt
Cummins Engine ISBe Block or Mechanical .pptCummins Engine ISBe Block or Mechanical .ppt
Cummins Engine ISBe Block or Mechanical .ppt
 
Volvo EC140B LC EC140BLC Excavator Service Repair Manual Instant Download.pdf
Volvo EC140B LC EC140BLC Excavator Service Repair Manual Instant Download.pdfVolvo EC140B LC EC140BLC Excavator Service Repair Manual Instant Download.pdf
Volvo EC140B LC EC140BLC Excavator Service Repair Manual Instant Download.pdf
 
Volvo EC140B LC EC140BLC Excavator Service Repair Manual Instant Download.pdf
Volvo EC140B LC EC140BLC Excavator Service Repair Manual Instant Download.pdfVolvo EC140B LC EC140BLC Excavator Service Repair Manual Instant Download.pdf
Volvo EC140B LC EC140BLC Excavator Service Repair Manual Instant Download.pdf
 

Último

What Causes The key not detected Message In Mercedes Cars
What Causes The key not detected Message In Mercedes CarsWhat Causes The key not detected Message In Mercedes Cars
What Causes The key not detected Message In Mercedes CarsGermany's Best Inc
 
办理昆士兰科技大学毕业证QUT毕业证留信学历认证
办理昆士兰科技大学毕业证QUT毕业证留信学历认证办理昆士兰科技大学毕业证QUT毕业证留信学历认证
办理昆士兰科技大学毕业证QUT毕业证留信学历认证jdkhjh
 
Can't Roll Up Your Audi A4 Power Window Let's Uncover the Issue!
Can't Roll Up Your Audi A4 Power Window Let's Uncover the Issue!Can't Roll Up Your Audi A4 Power Window Let's Uncover the Issue!
Can't Roll Up Your Audi A4 Power Window Let's Uncover the Issue!Mint Automotive
 
原版定制copy澳洲查尔斯顿大学毕业证UC毕业证成绩单留信学历认证保障质量
原版定制copy澳洲查尔斯顿大学毕业证UC毕业证成绩单留信学历认证保障质量原版定制copy澳洲查尔斯顿大学毕业证UC毕业证成绩单留信学历认证保障质量
原版定制copy澳洲查尔斯顿大学毕业证UC毕业证成绩单留信学历认证保障质量sehgh15heh
 
Pros and cons of buying used fleet vehicles.pptx
Pros and cons of buying used fleet vehicles.pptxPros and cons of buying used fleet vehicles.pptx
Pros and cons of buying used fleet vehicles.pptxjennifermiller8137
 
原版1:1定制(IC大学毕业证)帝国理工学院大学毕业证国外文凭复刻成绩单#电子版制作#留信入库#多年经营绝对保证质量
原版1:1定制(IC大学毕业证)帝国理工学院大学毕业证国外文凭复刻成绩单#电子版制作#留信入库#多年经营绝对保证质量原版1:1定制(IC大学毕业证)帝国理工学院大学毕业证国外文凭复刻成绩单#电子版制作#留信入库#多年经营绝对保证质量
原版1:1定制(IC大学毕业证)帝国理工学院大学毕业证国外文凭复刻成绩单#电子版制作#留信入库#多年经营绝对保证质量208367051
 
原版1:1复刻俄亥俄州立大学毕业证OSU毕业证留信学历认证
原版1:1复刻俄亥俄州立大学毕业证OSU毕业证留信学历认证原版1:1复刻俄亥俄州立大学毕业证OSU毕业证留信学历认证
原版1:1复刻俄亥俄州立大学毕业证OSU毕业证留信学历认证jdkhjh
 
办理克莱姆森大学毕业证成绩单|购买美国文凭证书
办理克莱姆森大学毕业证成绩单|购买美国文凭证书办理克莱姆森大学毕业证成绩单|购买美国文凭证书
办理克莱姆森大学毕业证成绩单|购买美国文凭证书zdzoqco
 
办理(PITT毕业证书)美国匹兹堡大学毕业证成绩单原版一比一
办理(PITT毕业证书)美国匹兹堡大学毕业证成绩单原版一比一办理(PITT毕业证书)美国匹兹堡大学毕业证成绩单原版一比一
办理(PITT毕业证书)美国匹兹堡大学毕业证成绩单原版一比一F La
 
Centering Equity Panel by Samantha Bingham
Centering Equity Panel by Samantha BinghamCentering Equity Panel by Samantha Bingham
Centering Equity Panel by Samantha BinghamForth
 
Transportation Electrification Funding Strategy by Jeff Allen and Brandt Hert...
Transportation Electrification Funding Strategy by Jeff Allen and Brandt Hert...Transportation Electrification Funding Strategy by Jeff Allen and Brandt Hert...
Transportation Electrification Funding Strategy by Jeff Allen and Brandt Hert...Forth
 
(办理学位证)(Toledo毕业证)托莱多大学毕业证成绩单修改留信学历认证原版一模一样
(办理学位证)(Toledo毕业证)托莱多大学毕业证成绩单修改留信学历认证原版一模一样(办理学位证)(Toledo毕业证)托莱多大学毕业证成绩单修改留信学历认证原版一模一样
(办理学位证)(Toledo毕业证)托莱多大学毕业证成绩单修改留信学历认证原版一模一样gfghbihg
 
-The-Present-Simple-Tense.pdf english hh
-The-Present-Simple-Tense.pdf english hh-The-Present-Simple-Tense.pdf english hh
-The-Present-Simple-Tense.pdf english hhmhamadhawlery16
 
办理萨省大学毕业证成绩单|购买加拿大USASK文凭证书
办理萨省大学毕业证成绩单|购买加拿大USASK文凭证书办理萨省大学毕业证成绩单|购买加拿大USASK文凭证书
办理萨省大学毕业证成绩单|购买加拿大USASK文凭证书zdzoqco
 
Equity & Freight Electrification by Jose Miguel Acosta Cordova
Equity & Freight Electrification by Jose Miguel Acosta CordovaEquity & Freight Electrification by Jose Miguel Acosta Cordova
Equity & Freight Electrification by Jose Miguel Acosta CordovaForth
 
办理乔治布朗学院毕业证成绩单|购买加拿大文凭证书
办理乔治布朗学院毕业证成绩单|购买加拿大文凭证书办理乔治布朗学院毕业证成绩单|购买加拿大文凭证书
办理乔治布朗学院毕业证成绩单|购买加拿大文凭证书zdzoqco
 
Building a Future Where Everyone Can Ride and Drive Electric by Bridget Gilmore
Building a Future Where Everyone Can Ride and Drive Electric by Bridget GilmoreBuilding a Future Where Everyone Can Ride and Drive Electric by Bridget Gilmore
Building a Future Where Everyone Can Ride and Drive Electric by Bridget GilmoreForth
 
办理科廷科技大学毕业证Curtin毕业证留信学历认证
办理科廷科技大学毕业证Curtin毕业证留信学历认证办理科廷科技大学毕业证Curtin毕业证留信学历认证
办理科廷科技大学毕业证Curtin毕业证留信学历认证jdkhjh
 
原版1:1定制宾州州立大学毕业证(PSU毕业证)#文凭成绩单#真实留信学历认证永久存档
原版1:1定制宾州州立大学毕业证(PSU毕业证)#文凭成绩单#真实留信学历认证永久存档原版1:1定制宾州州立大学毕业证(PSU毕业证)#文凭成绩单#真实留信学历认证永久存档
原版1:1定制宾州州立大学毕业证(PSU毕业证)#文凭成绩单#真实留信学历认证永久存档208367051
 

Último (20)

What Causes The key not detected Message In Mercedes Cars
What Causes The key not detected Message In Mercedes CarsWhat Causes The key not detected Message In Mercedes Cars
What Causes The key not detected Message In Mercedes Cars
 
办理昆士兰科技大学毕业证QUT毕业证留信学历认证
办理昆士兰科技大学毕业证QUT毕业证留信学历认证办理昆士兰科技大学毕业证QUT毕业证留信学历认证
办理昆士兰科技大学毕业证QUT毕业证留信学历认证
 
Can't Roll Up Your Audi A4 Power Window Let's Uncover the Issue!
Can't Roll Up Your Audi A4 Power Window Let's Uncover the Issue!Can't Roll Up Your Audi A4 Power Window Let's Uncover the Issue!
Can't Roll Up Your Audi A4 Power Window Let's Uncover the Issue!
 
原版定制copy澳洲查尔斯顿大学毕业证UC毕业证成绩单留信学历认证保障质量
原版定制copy澳洲查尔斯顿大学毕业证UC毕业证成绩单留信学历认证保障质量原版定制copy澳洲查尔斯顿大学毕业证UC毕业证成绩单留信学历认证保障质量
原版定制copy澳洲查尔斯顿大学毕业证UC毕业证成绩单留信学历认证保障质量
 
Pros and cons of buying used fleet vehicles.pptx
Pros and cons of buying used fleet vehicles.pptxPros and cons of buying used fleet vehicles.pptx
Pros and cons of buying used fleet vehicles.pptx
 
原版1:1定制(IC大学毕业证)帝国理工学院大学毕业证国外文凭复刻成绩单#电子版制作#留信入库#多年经营绝对保证质量
原版1:1定制(IC大学毕业证)帝国理工学院大学毕业证国外文凭复刻成绩单#电子版制作#留信入库#多年经营绝对保证质量原版1:1定制(IC大学毕业证)帝国理工学院大学毕业证国外文凭复刻成绩单#电子版制作#留信入库#多年经营绝对保证质量
原版1:1定制(IC大学毕业证)帝国理工学院大学毕业证国外文凭复刻成绩单#电子版制作#留信入库#多年经营绝对保证质量
 
原版1:1复刻俄亥俄州立大学毕业证OSU毕业证留信学历认证
原版1:1复刻俄亥俄州立大学毕业证OSU毕业证留信学历认证原版1:1复刻俄亥俄州立大学毕业证OSU毕业证留信学历认证
原版1:1复刻俄亥俄州立大学毕业证OSU毕业证留信学历认证
 
办理克莱姆森大学毕业证成绩单|购买美国文凭证书
办理克莱姆森大学毕业证成绩单|购买美国文凭证书办理克莱姆森大学毕业证成绩单|购买美国文凭证书
办理克莱姆森大学毕业证成绩单|购买美国文凭证书
 
办理(PITT毕业证书)美国匹兹堡大学毕业证成绩单原版一比一
办理(PITT毕业证书)美国匹兹堡大学毕业证成绩单原版一比一办理(PITT毕业证书)美国匹兹堡大学毕业证成绩单原版一比一
办理(PITT毕业证书)美国匹兹堡大学毕业证成绩单原版一比一
 
Centering Equity Panel by Samantha Bingham
Centering Equity Panel by Samantha BinghamCentering Equity Panel by Samantha Bingham
Centering Equity Panel by Samantha Bingham
 
Transportation Electrification Funding Strategy by Jeff Allen and Brandt Hert...
Transportation Electrification Funding Strategy by Jeff Allen and Brandt Hert...Transportation Electrification Funding Strategy by Jeff Allen and Brandt Hert...
Transportation Electrification Funding Strategy by Jeff Allen and Brandt Hert...
 
(办理学位证)(Toledo毕业证)托莱多大学毕业证成绩单修改留信学历认证原版一模一样
(办理学位证)(Toledo毕业证)托莱多大学毕业证成绩单修改留信学历认证原版一模一样(办理学位证)(Toledo毕业证)托莱多大学毕业证成绩单修改留信学历认证原版一模一样
(办理学位证)(Toledo毕业证)托莱多大学毕业证成绩单修改留信学历认证原版一模一样
 
-The-Present-Simple-Tense.pdf english hh
-The-Present-Simple-Tense.pdf english hh-The-Present-Simple-Tense.pdf english hh
-The-Present-Simple-Tense.pdf english hh
 
Hot Sexy call girls in Pira Garhi🔝 9953056974 🔝 escort Service
Hot Sexy call girls in Pira Garhi🔝 9953056974 🔝 escort ServiceHot Sexy call girls in Pira Garhi🔝 9953056974 🔝 escort Service
Hot Sexy call girls in Pira Garhi🔝 9953056974 🔝 escort Service
 
办理萨省大学毕业证成绩单|购买加拿大USASK文凭证书
办理萨省大学毕业证成绩单|购买加拿大USASK文凭证书办理萨省大学毕业证成绩单|购买加拿大USASK文凭证书
办理萨省大学毕业证成绩单|购买加拿大USASK文凭证书
 
Equity & Freight Electrification by Jose Miguel Acosta Cordova
Equity & Freight Electrification by Jose Miguel Acosta CordovaEquity & Freight Electrification by Jose Miguel Acosta Cordova
Equity & Freight Electrification by Jose Miguel Acosta Cordova
 
办理乔治布朗学院毕业证成绩单|购买加拿大文凭证书
办理乔治布朗学院毕业证成绩单|购买加拿大文凭证书办理乔治布朗学院毕业证成绩单|购买加拿大文凭证书
办理乔治布朗学院毕业证成绩单|购买加拿大文凭证书
 
Building a Future Where Everyone Can Ride and Drive Electric by Bridget Gilmore
Building a Future Where Everyone Can Ride and Drive Electric by Bridget GilmoreBuilding a Future Where Everyone Can Ride and Drive Electric by Bridget Gilmore
Building a Future Where Everyone Can Ride and Drive Electric by Bridget Gilmore
 
办理科廷科技大学毕业证Curtin毕业证留信学历认证
办理科廷科技大学毕业证Curtin毕业证留信学历认证办理科廷科技大学毕业证Curtin毕业证留信学历认证
办理科廷科技大学毕业证Curtin毕业证留信学历认证
 
原版1:1定制宾州州立大学毕业证(PSU毕业证)#文凭成绩单#真实留信学历认证永久存档
原版1:1定制宾州州立大学毕业证(PSU毕业证)#文凭成绩单#真实留信学历认证永久存档原版1:1定制宾州州立大学毕业证(PSU毕业证)#文凭成绩单#真实留信学历认证永久存档
原版1:1定制宾州州立大学毕业证(PSU毕业证)#文凭成绩单#真实留信学历认证永久存档
 

Plugin nkr 4-jb1

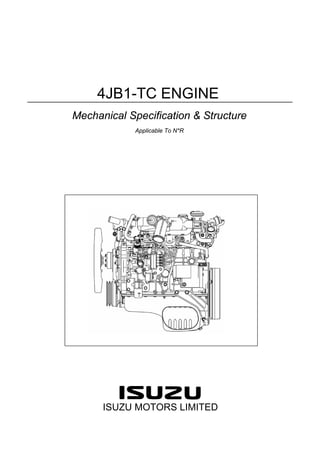
  • 1. 4JB1-TC ENGINE Mechanical Specification & Structure Applicable To N*R ISUZU MOTORS LIMITED
  • 2. 4JB1-TC Engine-1 OUTLINE The four cycle direct injection 4JB1-TC engine features two valves per cylinder that are operated via a single camshaft fitted to the engine block. Auto-thematic pistons with cast steel struts are used to reduce thermal expansion and resulting engine noise when the engine is cold. Chrome plated dry type cylinder liners provide the highest durability. The crankshaft has been tufftrided to provide a longer service life. Because the crankshaft is tufftrided, it cannot be reground. The 4JB1-TC engine is equipped with the VE type mechanical fuel injection pump made by Bosch Engine Performance Curve 0 10 20 30 40 50 60 70 80 500 1000 1500 2000 2500 3000 3500 4000 Engine Speed (rpm) Output (kw) 0 50 100 150 200 250 Torque (Nm) 4JB1-TC Applicable Emission Euro 2 Maximum Output 70kw/3400rpm (95PS/3400rpm) Maximum Torque 206Nm/2000rpm (21.0kgm/2000rpm)
  • 3. ENGINE MAIN DATA & SPECIFICATION General Engine Model 4JB1-TC Engine Type Diesel, Four Cycle, Overhead Valve, Water Cooled Engine Weight (Kg) (With Cooling Fan, Clutch Disc) Approximately 256 Cylinder Layout - Number of Cylinders Inline-Four Cylinders Fuel Injection Order 1-3-4-2 Bore x Stroke (mm) 93.0 x 102.0 Total Displacement (cc) 2771 Combustion Camber Type Direct Injection Cylinder Liner Dry Type Idle Speed (rpm) 750 ± 25 Fuel System Injection Pump Type BOSCH Distributor VE Type Governor Type Mechanical Variable All Speed Injection Nozzle Type Hole Nozzle Number of Injection Hole 5 Diameter of Injection Hole (mm) 0.20 1st Stage Injection Nozzle Operating Pressure (Mpa) 19.5 2nd Stage Injection Nozzle Operating Pressure (Mpa) 26.5 Fuel Filter Type Cartridge Paper Element and Water Separator Valve System Valve Layout Overhead Valve Drive Type Gear Drive Intake Valve Open At BTDC (deg) 24.5 Intake Valve Close At ABDC (deg) 55.5 Exhaust Valve Open At BBDC (deg) 54.0 Exhaust Valve Close At ATDC (deg) 26.0 Intake Valve Clearance At Cold (mm) 0.4 Exhaust Valve Clearance At Cold (mm) 0.4 Cooling System Cooling Method Water Cooled Water Capacity (Litters) (Including Radiator) 10 Water Pump Type Centrifugal Water Pump Pulley Ratio (Crank / Pump) 1.2 Thermostat Type Wax Pellet With Jiggle Valve Thermostat Initial Opening Temperature (deg. C) 82 Thermostat Full Opening Temperature (deg. C) 95 4JB1-TC Engine-2
  • 4. Lubricating System Lubricating Method Pressure Circulation Oil Pump Type Gear Oil Capacity (Litter) 6.6 - 7.1 Oil Filter Type Cartridge Paper Element Starting System Starter Motor Output (V-kW) 12 - 2.0 or 12 - 2.2 Charge System Alternator Output (V-A) 12 - 50 or 12 - 60 Regulator Type IC 4JB1-TC Engine-3
  • 5. 4JB1-TC Engine-4 MAIN CONSTRUCTION PARTS CYLINDER BLOCK Cylinder Block The cylinder block is a complex structure with cooling water and lubricating oil passages, and crankshaft supports in the lower part. The cylinder block is made of cast iron because it has to be strong enough to resist not only high temperatures, but also the high pressure gasses generated in the cylinders. It also needs to have sufficient corrosion resistance to withstand these gasses. The water cooled cylinder block can be divided into a one-piece cast type and a liner type. In the liner type liners are inserted into the cylinder portion of the block. Furthermore, liners can be divided into a dry type and a wet type according to the cooling method employed. With the dry liner type, thin sleeve is pressed into place inside the cylinder. When worn, the liner can be easily replaced. With dry liner type there is no possibility of cooling water leakage. When replacing liners, it is necessary to measure the liners to make sure that the dimensions meet the requirement, because heat conduction decreases is the liners do not closely fit the cylinder block. With cylinder liners, the wear is greatest near the top of piston ring at top dead center, and the wear decreases towards bottom dead center. This is due to piston slapping, side pressure, and thermal expansion. The sulfur contained in light oil is burnt to form SO2, part of which is oxidized into SO3. When the water vapor in the burnt gas reaches the dew point, sulfuric acid is generated by the reaction (H2O + SO3 = H2SO4). The carbon generated by combustion absorbs the sulfuric acid, and causes serious chemical corrosion. Cylinder Liner Grade Identification
  • 6. 4JB1-TC Engine-5 The 4JB1 engine employs chrome plated dry type cylinder liner. Marks are made on top of the cylinder block to indicate the cylinder liner diameter. This information is important when cylinder liners need to be replaced. The production line stamped cylinder liner grade on the top of cylinder body, the cylinder liner outside diameter grade 1, 2, 3 and 4. If you find cylinder liner outside diameter grade "1" on the cylinder body and piston outside diameter "B" on the piston top or result of measurement of each parts, you will select service parts grade for cylinder liner "1-AX" grade and piston "AX" grade. Inspection Item Cylinder Body Bore Measurement Required Tool: Cylinder Indicator Measure the point "A" across ①−① , ②−② , ③−③ and ④−④ . Calculate the average value of the four measurements. Service Standard: 95.001 - 95.040mm Production Line Use Measurement in Service Service Parts Liner Outside Grade Cylinder Body Bore Diameter Average (mm) Liner Outside Diameter (mm) Liner Grade (Without Piston) Liner Bore Diameter (mm) 1 95.001 – 95.010 95.011 – 95.020 1-AX (For piston size AX) 93.035 – 93.050 1-CX (For piston size CX) 93.051 – 93.066 2 95.011 – 95.020 95.021 – 95.030 2-AX (For piston size AX) 93.035 – 93.050 2-CX (For piston size CX) 93.051 – 93.066 3 95.021 – 95.030 95.031 – 95.040 3-AX (For piston size AX) 93.035 – 93.050 3-CX (For piston size CX) 93.051 – 93.066 4 95.031 – 95.040 95.041 – 95.050 4-AX (For piston size AX) 93.035 – 93.050 4-CX (For piston size CX) 93.051 – 93.066
  • 7. 4JB1-TC Engine-6 Cylinder Liner Bore Measurement Required Tool: Cylinder Indicator Measure the point "A" across ②−② and ③−③ . Calculate the average value of the two measurements. Service Standard: 93.020 - 93.060mm Cylinder Body Upper Face Warpage Required Tool: Straight Edge, Feeler Gauge Service Standard: 0.05mm or less Service Limit: 0.20mm Cylinder Liner Projection Required Tool: Straight Edge, Feeler Gauge Service Standard: 0 - 0.1mm Service Limit: Between any two adjacent cylinders must not exceed 0.03mm
  • 8. 4JB1-TC Engine-7 PISTON, PISTON RING & CONNECTING ROD 1. Connecting Rod Bearing 2. Piston Ring 3. Piston Pin Snap Ring 4. Piston Pin 5. Connecting Rod 6. Piston The 4JB1 engine accommodates the 4 pistons made of aluminum alloy. The pistons are exposed to high temperature and high pressure gas during the explosion stroke. The gas pressure is conveyed to the crankshaft, and most of the heat received is released to the cooling water via the cylinder walls. During operation, the pistons must undergo continuous reciprocating motion at high speed along the cylinder walls under side pressure, and at the same time maintain combustion pressure in the combustion chambers. Thus, various factors, such as piston weight, thermal expansion, shape, and dimensions, must be taken into account in designing the pistons. With the offset piston, the piston pin center is offset a certain amount to the thrust side of the bore to reduce side forces on the piston and this marks for reduced piston slapping noise. 1. Piston Ring Carrier When the piston temperature rises, piston expansion will increase and this causes piston seizure or ring sticking. Then ring groove wear will increase, and reduce the gas sealing performance. Therefore, particularly, in the case of aluminum alloy pistons, a special cast iron ring carrier is cast into the top ring groove which is exposed to a great heat load and this improves wear resistance of the ring groove. 1
  • 9. 4JB1-TC Engine-8 1. Size Mark Identification 2. Front Mark The piston diameter is essential information in case an engine is overhauled. A, B, C and D are the marks used to identify the piston diameter. These marks can be found at the top of the piston. Using the above diagram you can order the correct piston. The tolerance between the piston and the cylinder liner is important to assemble the engine. Note: The cylinder liner installation procedure may result in slight decreases in cylinder liner clearances. Always measure the cylinder liner clearance after installation to be sure that it is correct. Size Mark Outside Diameter (mm) Service Grade Service Piston Diameter (mm) A 92.985 – 92.994 AX 92.989 – 93.004 B 92.995 – 93.004 C 93.005 – 93.014 CX 93.005 – 93.020 D 93.015 – 93.024
  • 10. 4JB1-TC Engine-9 1. First Compression Ring 2. Second Compression Ring 3. Oil Ring The aluminum alloy pistons of 4JA1 engine have an integrated toroidal shaped combustion chamber with centrally arranged swirl chambers. Two piston rings guarantee a fast build up of air pressure and one oil ring prevents oil from the sump entering the combustion chamber. The piston rings are fitted into the ring grooves around the pistons to keep the combustion chamber airtight between the piston and cylinder. They also conduct the heat received by the pistons to the cylinder walls. The piston rings scrap off the oil sprayed on the cylinder walls to leave the minimum required oil film to lubricate the pistons and piston rings, and prevent excess oil from entering the combustion chambers. The rings used mainly to maintain combustion pressure are called compression rings, and those used for scraping off excess oil, are known as oil rings. The compression rings alternately hit the top and bottom of the ring grooves as the pistons run up and down. During the explosion stroke the high pressure gas pushes down the rings. This is the only time they move ahead of the pistons. The compression rings also increase combustion pressure as the high pressure gas pushes the rings towards the cylinder walls from behind the rings. Oil rings are tapered or grooved on their sliding surface to increase unit pressure so that a close fit with the cylinder walls can be maintained by their own tension. To meet demands for oil rings with greater unit pressure suitable for high speed engine, oil ring with expander have come into general use.
  • 11. 4JB1-TC Engine-10 Piston Cooling Jet Four oil jets are placed under the pistons to cool the piston bottom. The jets are supplied with oil, directly from the oil pump. The piston bottom is special shaped to guide the oil along the entire surface to ensure a sufficient cooling. 1. Piston Front Mark 2. Casting Mark The connecting rod is a rod which connects a piston to the crankshaft, and transmits explosion forces imposed on the piston, to the crankshaft. The connecting rod is made of forging metal to resist compression, tension and bending forces. One end of the connecting rod is connected to the piston with a piston pin, and is called the "small end". While the other end is called "big end" generally a bushing is press-fitted to the small end, however the big end is divided into two pieces, and they are tightened to the crankshaft with bolts.
  • 12. 4JB1-TC Engine-11 Inspection Item Piston Diameter & Piston Clearance Measurement Required Tool: Micrometer Measurement Point: 74mm Grade A: 92.985 - 92.994mm Grade B: 92.995 - 93.004mm Grade A: 92.985 - 92.996mm Grade A: 92.985 - 92.997mm Piston Ring & Ring Groove Clearance Required Tool: Feeler Gauge Service Standard: 0.090 - 0.125mm (1st) 0.050 - 0.0750mm (2nd) 0.03 - 0.07mm (Oil) Service Limit: 0.150mm Piston Ring Gap Required Tool: Feeler Gauge Service Standard: 0.2 - 0.4mm (1st & 2nd) / 0.1 - 0.3mm (Oil) Service Limit: 1.5mm
  • 13. 4JB1-TC Engine-12 Piston Pin Diameter Required Tool: Micrometer Service Standard: 30.995 - 31.000mm Service Limit: 30.970mm Piston Pin & Piston Clearance Required Tool: Cylinder Indicator Service Standard: 0.002 - 0.004mm Service Limit: 0.04mm Piston Pin & Connecting Rod Small End Bushing Clearance Required Tool: Caliper Calibrator, Dial Indicator Service Standard: 0.008 - 0.020mm Service Limit: 0.050mm Connecting Rod Alignment Required Tool: Connecting Rod Aligner, Feeler Gauge Service Standard: 0.08mm or Less (Bend) / 0.05mm or Less (Twist) Service Limit: 0.20mm (Bend) / 0.15mm (Twist)
  • 14. 4JB1-TC Engine-13 Connecting Rod Thrust Clearance Required Tool: Feeler Gauge Service Standard: 0.23mm Service Limit: 0.35mm CRANKSHAFT 1. Crankshaft 2. Crankshaft Upper Bearing 3. Crankshaft Lower Bearing 4. Crankshaft Thrust Bearing 5. Crankshaft Bearing Cap The crankshaft is the main shaft of the engine which takes the pressure of burnt gas generated during engine operation at the crankshaft pins via the connecting rods, converts the power into rotary motion, and transmits it to the outside. The crankshaft balance relative to its axial center is maintained by adjusting the balance weights, specially by drilling holes in them. Note: To increase crankshaft strength, tufftriding (nitrizing treatment) has been applied. Because of this, it is not possible to regrind the crankshaft surfaces. Therefore, under size bearing are not available.
  • 15. 4JB1-TC Engine-14 Crankshaft Bearing Grade Mark Identification Crankshaft Journal Grade Identification Inspection Item Crankshaft Run-out Required Tool: Dial Indicator Service Standard: 0.05mm or Less Service Limit: 0.08mm Crankshaft & Crank Pin Diameter Required Tool: Micrometer Measure the point ③ , ④ across ①−① and ②−② . Service Standard: 69.917 - 69.932mm (Crankshaft Journal) 52.915 - 52.930mm (Crank Pin) 0.05mm or Less (Uneven Wear) Service Limit: 69.91mm (Crankshaft Journal) 52.90mm (Crank Pin) 0.08mm (Uneven Wear) Main Bering Bore Diameter (mm) Crankshaft Main Journal Diameter (mm) Grade Main Bearing Bore Diameter (mm) Size Mark Outside Diameter Crankshaft Bering Size Oil Clearance (mm) 1 73.992 - 74.000 1 or 69.927 - 69.932 4 0.045 - 0.061 2 or 69.922 - 69.927 4 0.050 - 0.066 3 or 69.917 - 69.922 5 0.052 - 0.068 2 73.983 – 73.992 1 or 69.927 - 69.932 2 0.042 - 0.059 2 or 69.922 - 69.927 3 0.044 - 0.061 3 or 69.917 - 69.922 4 0.046 - 0.063 3 73.975 – 73.983 1 or 69.927 - 69.932 1 0.037 - 0.053 2 or 69.922 - 69.927 2 0.039 - 0.055 3 or 69.917 - 69.922 2 0.044 - 0.060
  • 16. 4JB1-TC Engine-15 Crankshaft Journal & Bearing Clearance Required Tool: Cylinder Indicator Service Standard: 0.035 - 0.080mm Service Limit: 0.110mm Connecting Rod Bearing Inside Diameter Required Tool: Cylinder Indicator Service Standard: 0.029 - 0.066mm Service Limit: 0.100mm
  • 17. 4JB1-TC Engine-16 CYLINDER HEAD 1. Water By-pass Hose 2. Thermostat Housing 3. Cylinder Head Cover 4. Injection Nozzle & Nozzle Holder 5. Rocker Arm Shaft & Rocker Arm 6. Push Rod 7. Cylinder Head 8. Cylinder Head Gasket The cylinder head is a vital component which forms the combustion chamber together with the cylinder block and piston. It is fitted with a valve mechanism and injection nozzles. The cylinder head is made of cast iron having great heat resistance and strength. It is exposed to burnt gas at high temperatures, and therefore must be airtight against compression and explosion pressures. The exhaust valves and injection nozzles, in particular, have complex water cooling passages to cool them uniformly since they are heated to high temperatures. The cylinder head is mounted on the cylinder block with a gasket between them. Unless the mounting bolts are tightened evenly in the proper order, problems such as burnt gas leakage and gasket damage can result. Because the cylinder head is a casting, it can in some cases become distorted over a long period. It is necessary, therefore, to check the flatness of its seating surface whether it is removed or installed.
  • 18. 4JB1-TC Engine-17 When Loosening Cylinder Head Bolts Torque 1st Step: 49Nm 2nd Step: 60 ° - 75 ° 3rd Step: 60 ° - 75 ° When Tightening Loosen the cylinder head bolts in numerical order a little at a time. They need to be checked for cracks and damages when dismantled. The cylinder head bolts are tightened according to the torque tightening method in numerical order. A cylinder gasket has to seal the combustion gases, lubricant oil and cooling water at the same time. The cylinder head gasket is of a metal 4 layer type of which the thickness can be identified even when the cylinder head is assembled to the engine. The thickness of the cylinder head gasket can be retrieved from three different marks that are located under the intake manifold. In case of an overhaul of the engine the thickness of the cylinder head gasket can be determined by measuring the piston projection. Gasket Grade Mark Piston Projection Gasket Thickness (mm) 0.758 – 0.813 1.60 0.813 – 0.859 1.65 0.859 – 0.914 1.70
  • 19. 4JB1-TC Engine-18 Inspection Item Cylinder Head Lower Face Warpage Required Tool: Straight Edge, Feeler Gauge Service Standard: 0.05mm or Less Service Limit: 0.20mm Maximum Grinding Allowance: 0.30mm Cylinder Head Height Required Tool: Height Gauge Service Standard: 91.95 - 92.05mm Service Limit: 91.55mm Manifold Fitting Face Warpage Required Tool: Straight Edge, Feeler Gauge Service Standard: 0.05mm or Less Service Limit: 0.20mm Maximum Grinding Allowance: 0.40mm Exhaust Manifold Warpage Required Tool: Straight Edge, Feeler Gauge Service Standard: 0.05mm or Less Service Limit: 0.20mm
  • 20. 4JB1-TC Engine-19 VALVE MECHANISM 1. Camshaft Timing Gear 2. Camshaft Thrust Plate 3. Camshaft 1. Snap Ring 2. Rocker Arm 3. Rocker Arm Shaft Bracket 4. Rocker Arm 5. Spring 6. Snap Ring 7. Rocker Arm Shaft The valve mechanism opens and closes the intake and exhaust valves at the correct moment to raise intake and exhaust efficiency and assure satisfactory delivery of engine performance. The crankshaft indirectly of engine performance. The crankshaft indirectly drives the camshaft through a gear. It consists of a crank gear, idler gear, camshaft gear, camshaft, tappets, push rods, rocker arms, valves and valve springs. The camshaft has intake and exhaust cams for every cylinder. Engine performance, involving valve opening and closing timing and firing order, depends particularly on the cams. The rocker arm is a lever moving about the rocker arm shaft, and conveys the motion of the push rod driven by the cam to open and close the valve. The purpose of the camshaft and rocker arms is to open and close the intake and exhaust valves to control the combustion timing. If these parts are worn or damaged, it will seriously affect engine performance.
  • 21. 4JB1-TC Engine-20 Valve timing means the valve opening and closing operation peculiar to an engine, and can be expressed by the crankshaft rotary angle. The valves do not open and close exactly at top dead center and bottom dead center because the intake air would not flow in immediately upon the opening of the intake valve. There is some delay due to the fact that the intake air has a moment of inertia and that the intake air passage area does not instantaneously increase. It follows, therefore, more air can be drawn into the cylinder by opening the valve slightly before top dead center. Air keeps flowing into the cylinder as long as there is a negative pressure, so the intake valve is closed after the piston begins to rise from bottom dead center. The exhaust valve is opened before bottom dead center to assure smooth discharge of exhaust gas, and closed after top dead center, as the combustion chamber pressure is high. It is known from the above description that there is a overlap period where both the intake and exhaust valves are open near top dead center. This is to discharge the remaining burnt gas by the intake of a fresh charge of air. This condition is known as valve overlap. The timing is controlled by the camshaft. Tappet Tappets operate to convey the cam action to the valves through push rod and rocker arms. Tappets have to withstand large forces these are the pressure of burnt gas, the tensile force of valve springs and inertia force of moving parts. Therefore, tappets are made of special cast iron, and the surface in contact with the cam is hardened by a suitable heat treatment. Furthermore, the bottom surfaces of the tappet is machined to a spherical surface to prevent the cam and tappet from deviating wear. To put is other way, each cam and tappet are offset to turn the tappet during operation and this makes for even contact with each other, and to improve the contact condition. TDC BDC 26.0 degree 54.0 degree TDCBDCTDC 24.5 degree 55.5degree In-ValveEx-Valve Valve Lift
  • 22. 4JB1-TC Engine-21 Valve & Valve Spring The purpose of the intake and exhaust valves is to assist passage of as much air and discharge gas as possible in the very short time of a single cycle of this piston. In addition the valves prevent high pressure gas leaking while in the are the closed position being able to open and close correctly despite exposure to high temperature burnt gas. Further, they have to withstand operation over an extended period. The valves supported by valve guides, operate only in the vertical plane. The valve face is machined to angle of 45° to seal the gas and convey heat to the valve seat when the valve is closed. The valves are made of heat resistant steel because the intake valves have to withstand temperatures up to about 400℃ and the exhaust valves operate in a temperature from 500℃ to 800℃. The valve spring holds the valve to the valve seat while it is closed to keep the combustion chamber airtight. Valve springs hold the working parts of the intake and exhaust valve mechanism to the cams by spring tension while the valves are in motion, thereby correctly opening and closing the valve according to the cam profile. The valve spring is generally a combination of two coil springs, that is, an inner and outer, each having a different tension value. This prevents valve surge during high speed engine operation. If the valve spring end is suddenly compressed by the rocker arm, the spring is not uniformly compressed, but is compressed from one end to the other. If this cycle is over-lapped with forced vibration from the cam, the amplitude grows, and sever stress is partially applied, possibly causing spring fatigue or breakage. This phenomenon is called valve spring surge. This phenomenon alters the valve spring opening and closing position and can result in reduced output power, increase noise, or in the worst case, breakage of the intake and exhaust valve mechanism. This can be prevented by using double springs.
  • 23. 4JB1-TC Engine-22 Inspection Item Rocker Arm Shaft Run-out Required Tool: Dial Indicator, V-Block Service Limit: 0.2mm Rocker Arm Shaft Outside Diameter Required Tool: Micrometer Service Standard: 18.98 - 19.00mm Service Limit: 18.90mm Rocker Arm Inside Diameter Required Tool: Caliper Calibrator, Dial Indicator Service Standard: 19.010 - 19.030mm 0.01 - 0.05mm (Clearance) Service Limit: 19.100mm 0.20mm (Clearance) Camshaft End Play Required Tool: Dial Indicator Service Standard: 0.08mm Service Limit: 0.20mm Camshaft Run-out Required Tool: Dial Indicator, V-Block Service Standard: 0.02mm or Less Service Limit: 0.10mm
  • 24. 4JB1-TC Engine-23 Camshaft Journal Diameter Required Tool: Micrometer Measure the point across 1 - 1 & 2 - 2 Service Standard: 49.945 - 49.975mm Service Limit: 49.60mm Cam Height Required Tool: Micrometer Service Standard: 42.016mm Service Limit: 41.65mm Camshaft Bearing Inside Diameter Required Tool: Cylinder Indicator Service Standard: 50.00 - 50.03mm 0.055mm (Camshaft Bearing Clearance) Service Limit: 50.08mm 0.12mm (Camshaft Bearing Clearance) Tappet Outside Diameter Required Tool: Micrometer Service Standard: 12.97 - 12.99mm Service Limit: 12.95mm Tappet & Cylinder Body Clearance Required Tool: Cylinder Indicator Service Standard: 0.03mm Service Limit: 0.10mm
  • 25. 4JB1-TC Engine-24 Push Rod Curvature Required Tool: Feeler Gauge Service Limit: 0.4mm or Less Valve Clearance Required Tool: Feeler Gauge Service Standard: 0.4mm (In & Ex) Valve Stem & Valve Guide Clearance Required Tool: Dial Indicator with Stand Service Standard: 0.039 - 0.069mm (In) / 0.064 - 0.096mm (Ex) Service Limit: 0.200mm (In) / 0.250mm (Ex) Valve Stem Outside Diameter Required Tool: Micrometer Service Standard: 7.946 - 7.961mm (In) / 7.921 - 7.936mm (Ex) Service Limit: 7.880mm (In) / 7.850mm (Ex) Valve Thickness Required Tool: Vernier Caliper Service Standard: 1.79mm (In) / 1.83mm (Ex) Service Limit: 1.50mm
  • 26. 4JB1-TC Engine-25 Valve Depression Required Tool: Straight Edge, Depth Gauge Service Standard: 0.73mm (In)/ 1.28mm (Ex) Service Limit: 0.70mm (In)/ 1.20mm(Ex) Valve Contact Width Required Tool: Vernier Caliper Service Standard: 1.7mm (In) / 2.0mm (Ex) Service Limit: 2.2mm (In) / 2.5mm (Ex) Valve Spring Free Height Required Tool: Vernier Caliper Service Standard: 48.0mm Service Limit: 47.1mm Valve Spring Squareness Required Tool: Steel Square Service Limit: 1.7mm Valve Spring Tension Required Tool: Spring Tester Compressed Height: 38.9mm Service Standard: 296.2N Service Limit: 257.9N
  • 27. 4JB1-TC Engine-26 TIMING GEAR TRAIN 1. Crankshaft Gear 2. Idle Gear A 3. Camshaft Gear 4. Idle Gear B 5. Fuel Pump Gear The 4JB1-TC engine used a gear type timing system. Benefits of a gear type timing system are; -Stiff and compact construction -Maintenance free -Direct power drive 1. Timing Mark Crankshaft Gear "X-X" & Idle Gear A "X" 2. Timing Mark Camshaft Gear "Y-Y" & Idle Gear A "Y" 3. Timing Mark Idle Gear B "Z" & Idle Gear A "Z-Z" The crankshaft gear (21 teeth) has a timing mark "X-X" that corresponds with a timing mark on the idler gear A. The idler gear A is a gear that transfers the rotating force to the idler gear B and camshaft gear. The bearing is supplied with oil via the hollow shaft. It has timing mark "Y" which correspond to timing mark on the camshaft gear, and "Z-Z" which corresponded to timing mark on the idler gear B, and "X" which corresponded to timing mark on the crankshaft gear. The number of teeth of the idler gear A is 31 teeth.
  • 28. 4JB1-TC Engine-27 The idler gear B has timing marks "Z" which corresponded to timing marks on the idler gear A, and "V- V" which corresponded to the fuel pump gear. The number of teeth of the idler gear B is 37 teeth. 1. Timing Mark Idle Gear B "V-V" & Pump Gear "V" The fuel pump gear is fixed to the fuel pump with a center bolt and positioned by a key to the fuel pump shaft. The fuel pump pulley has a timing mark "V" which corresponds to timing marks on idler gear B. The fuel pump gear has 42 teeth.
  • 29. 4JB1-TC Engine-28 In case the gear case is removed, two or three different timing marks are visible on the gears. To inspect or set the aligning of the timing gear, inspection holes are available in the timing case. Under normal circumstances, a cover seals these inspection holes. When the covers are removed, the second mark of the gear becomes visible. These marks are used for aligning timing related parts that do not require disassembling of the timing case. Please take in account that when timing gears are aligned using the timing gear marks shown in the picture above, that you have to rotate the crankshaft to top dead center to check the timing through the inspection holes. Top dead center can be identified by the marks on the crankshaft pulley and the timing gear case. 42 21 31 37 42
  • 30. 4JB1-TC Engine-29 TURBOCHARGER 1. Turbocharger Specification Number 2. Production Serial Number 3. Isuzu Parts Number A water-cooled turbocharger, with floating bearings, made by Ishikawajima-Harima Heavy Ind. Co., Ltd. is used. The 4JB1engine has RHF 4 type. The turbocharger internal mechanism consists of the turbine wheel, the compressor wheel, and the radial bearings. These parts are supported by the bearing housing. The turbocharger external mechanism consists of the compressor housing air intake port and the turbine housing air exhaust port. The turbocharger increases air intake efficiency. This results in increased engine power, reduced fuel consumption, and minimal engine noise. The turbocharger operates at very high speeds and temperatures. Part materials have been carefully selected and machined to extremely high precision. Turbocharger servicing requires great care and expertise. If reduced performance is noted, check the engine for damage or wear. If there is no apparent engine damage or wear, trouble with the turbocharger is indicated. Turbo Spec. 1 Serial No. RHF4H 2 Parts No. 3
  • 31. 4JB1-TC Engine-30 Inspection Item Waste Gate Operating Pressure Required Tool: Pressure Gauge Service Standard: 105 - 113KPa (782 - 848mHg) when the rod is moved to 2mm Wheel Shaft End Play Required Tool: Dial Indicator Service Standard: 0.02 - 0.08mm Service Limit: 0.09mm Wheel Shaft & Bearing Clearance Required Tool: Dial Indicator Service Standard: 0.07 - 0.12mm Service Limit: 0.16mm
  • 32. 4JB1-TC Engine-31 ENGINE LUBRICATION LUBRICATION SYSTEM 1. Oil Pump Relief Valve Operating Pressure: 6.2 - 7.8kg/cm 2 (620 - 780Kpa) 2. Regulating Valve Operating Pressure: 5.7 - 6.3kg/cm 2 (570 - 630Kpa) 3. Oil Cooler Relief Valve Opening Pressure: 2.7 - 3.3kg/cm 2 (270 - 330Kpa) 4. Oil Filter Relief Valve Opening Pressure: 0.8 - 1.2kg/cm 2 (80 - 120Kpa) 5. Oil Pressure Switch Operating Pressure: 0.3 - 0.5kg/cm 2 (29.4 - 49.0Kpa) 6. Regulating Valve: 1.8 - 2.2kg/cm 2 (180 - 220Kpa) Lubricating oil is pumped from the oil pump to the cylinder body oil gallery through the oil cooler and oil filter. It is then delivered to the vital parts of the engine from the cylinder body oil gallery. The engine has many sliding and rotating parts. These parts constantly generate friction, which acts a frictional resistance. The process of forming an oil film to prevent direct contact of these friction-causing parts, converting their friction into fluid friction, and thus minimizing frictional resistance is called lubrication. The entire oil supply route is called a lubricating system. Oil not only reduces friction between moving parts but cools, cleans, seals, prevents rusting, and keeps dust out. A forced circulation system which pressure-feeds oil from an oil pump is generally used. The forced circulation lubrication system consists of an oil pan, oil pump, oil filter, oil cooler, and oil gallery in the cylinder block. Oil Pump Oil Filter 4: Relief Valve 3: Relief Valve Cylinder Body Oil Gallery Warning Lamp Oil Cooler Oil Filter & Cooler Assembly Oil Strainer 6: Regulating Valve Piston Cooling Jet Idler Gear Shaft Oil pipe Connecting Rod Bearing Crankshaft Bearing Camshaft Bearing Rocker Arm Shaft Rocker Arm Vacuum Pump Oil Pan 5: Oil Press. SW Turbo-charge r 1: Relief Valve 2: Regulating Valve Timing Gear
  • 33. 4JB1-TC Engine-32 OIL PUMP 1. Oil Pump Assembly 2. Pinion Gear 3. Gasket 4. Sprit Pin 5. Relief Valve Assembly 6. Oil Pump Body 7. Driven Gear 8. Drive Gear 9. Pump Cover 10. Oil Strainer 11. Oil Pipe 12.Gasket Oil Pipe The oil pump is installed on the cylinder body by means of two bolts, and it is driven by the gear on the camshaft to conduct oil in the oil pan to the parts to be lubricated. 1. Drive Gear (driven by the camshaft) 2. Driven Gear The gear type oil pump is adopted to the 4JA1 engine. The geared pump is structured as shown in the picture. The oil pump driven gear turns along the inner surface of the housing together with the pump gear which is driven by the camshaft. As a result, a negative pressure is created between the gears and the housing which draws the oil out of the oil pan through a strainer (from A). The drawn oil is discharged along the housing (to B), and pressure-fed to the oil gallery. The efficiency of the geared pump varies with the clearance between the gears and housing, oil pipe resistance, oil feed pressure, rpm and oil viscosity. A B 21
  • 34. 4JB1-TC Engine-33 Inspection Item Gear Teeth & Body Inner Wall Clearance Required Tool: Feeler Gauge Service Standard: 0.14mm Service Limit: 0.20mm Gear & Body Clearance Required Tool: Feeler Gauge, Steel Square Service Standard: 0.06mm Service Limit: 0.15mm OIL FILTER & OIL COOLER 1. Oil Filter 2. Oil Cooler Relief Valve 3. Regulating Valve Engine oil will slowly become contaminated by metal fragments produced by the friction of the working and sliding parts of the engine, and by carbon and sludge generated by fuel combustion. Heavy sediment will settle to the bottom of the oil pan, while particles in suspension will be fed with the oil to engine parts, possibly causing accelerated wear and seizure. It is for these reason that an oil filter is installed in the oil passage to remove such foreign particles. The filter is either a full-flow type, which allows all the oil to pass through it, or a partial-flow type, which allows only part of the oil to pass through. The full-flow type is used for 4JB1 engine. A bypass valve is built into the oil filter. In case of filter element become clogged, the oil can be directly fed to the oil gallery without going through the element. Thus safe lubrication of the system is assumed. 1 2 3
  • 35. 4JB1-TC Engine-34 1. Engine Coolant Inlet Port 2. Engine Coolant Outlet Port 1. From Oil Pump 2. To Oil Pan 3. To Oil Galley 4. Regulating Valve 5. Oil Cooler Relief Valve Lubricating oil for the most part often acts as a coolant for surfaces that are subject to severe friction. When the temperature of lubricating oil exceeds 125 - 130 degree centigrade, its lubricating performance, stable up to this temperature, suddenly drops, and it becomes difficult to maintain the oil film. As a result, rotating and sliding parts may begin to stick. Therefore, vehicles operated under severe conditions, that is, under extreme load at high speed for extended periods, are equipped with an oil cooler to prevent the lubricating oil from overheating. The plate tube type oil cooler allows lubricating oil to pass through the tube whose outer surfaces are cooled by engine coolant. 1 2 2 3 4 5 1
  • 36. 4JB1-TC Engine-35 Inspection to determine if any clogging up of the oil cooler elements has occurred, when the oil cooler unit is detached from the engine, pour oil or light oil into the oil cooler element through the inlet port, and check to see that it flows away from the outlet port. However if the oil cooler unit is attached to the engine, the following procedure is recommended; 1) Check oil gallery pressure at idling speed If the oil cooler element is clogged up, the oil gallery pressure reading will be increased 1 to 2 kg/cm2 (100 - 200 Kpa) over the normal figure. This increased pressure is due to an oil pressure loss in the oil cooler element. 2) Check the oil temperature in the oil gallery If the oil cooler element is clogged up, the oil temperature in the oil gallery will be higher than normal. If the engine operates at high speed, or is heavily loaded, the oil temperature will increase rapidly. Inspection Item Water Leakage 1. Submerge the oil cooler water passage. 2. Apply compressed air (200Kpa /2kg/cm2) If air bubbles rise to the surface, there is water leakage.
  • 37. 4JB1-TC Engine-36 ENGINE COOLING COOLING SYSTEM 1. Radiator Cap 2. Reservoir Tank 3. Cylinder Head 4. Radiator 5. Cooling Fan 6. Thermostat 7. Water Pump 8. Car Heater Unit 9. Oil Cooler 10. Cold Starting Device 11. Fuel Injection Pump The engine cooling system consists of the radiator, the water pump, the cooling fan, and the thermostat. The heat generated by fuel combustion in the cylinder heats the component parts around the combustion chambers of the engine. If these parts are not properly cooled, the inside engine temperature rises sharply and overheats, thus reducing output power. It also adversely affects the lubricating oil supplied to the moving parts of the engine, possibly reducing lubrication performance, altering oil properties, or causing abnormal wear and seizure. To quickly increase cold engine coolant temperature for smooth engine operation, the coolant is circulated by the water pump and through the by-pass hose and back to the cylinder body. The coolant does not circulate through the radiator. Overcooling, on the other hand, can lower thermal efficiency and deteriorate combustion. It can also accelerate cylinder liner wear as the sulfur dioxide generated in the combustion stroke is combined with the water in the gas to form a corrosive substance. The cooling system is designed to prevent engine overheating and overcooling, and maintain engine operation at an appropriate temperature. When the coolant temperature reaches specified value, the thermostat will begin to open and a gradually increasing amount of coolant will circulate through the radiator. The thermostat will be fully open when the coolant temperature reaches specified value. All of the coolant is now circulating through the radiator for effective engine cooling.
  • 38. 4JB1-TC Engine-37 WATER PUMP The water pump is a centrifugal impeller type and is driven by V type drive belt. The water pump draws the coolant from the radiator, feeds it through the oil cooler into the cylinder block to cool the outer surfaces of the cylinders, and then into the cylinder head. The water in the cylinder head is directed by a water jet to cool the outer surfaces of the nozzle holders and around the valve seats. After cooling the cylinder head, the water runs through the water outlet pipe to the radiator. The water outlet pipe has a thermostat to regulate the engine cooling water temperature. If the cooling water temperature is below the valve operating temperature, the cooling water is fed back through the water pump by-pass into the engine without returning to the radiator.
  • 39. 4JB1-TC Engine-38 THERMOSTAT 1. Jiggle Valve The thermostat is a wax pellet type with a jiggle valve and has an opening temperature of 82°C - 95 ° C. The full opening valve lift is more than 10 mm. The thermostat opens and closes the water outlet pipe and radiator water passage according to the cooling water temperature to control it and prevent the engine from overheating or overcooling. When the cooling water is cold immediately after starting the engine, the water passage is closed by the valve, and the cooling water keeps circulating through the by-pass circuit without going through the radiator, thus permitting speedy engine warm up. As the water temperature rises, the valve opens to connect the water passage to the radiator and the by-pass circuit is closed so that the engine temperature may be kept at an appropriate level. If the engine becomes overcooled during operation, the water passage valve is automatically closed. This thermostat has wax sealed inside its casing, and the valve opens or closes when the wax expands or contracts, moving a spring. When the cooling water temperature is low, the wax is solid and contracted so that the valve is closed under the pressure of the spring. When the water temperature rises, the wax liquefies and expands to push the spring and valve down, to open the valve. A complete cut off of the cooling water to the radiator when the thermostat is fully closed will shorten engine warm up time, but the system cannot be filled with cooling water because air will remain trapped inside the engine. Therefore, the thermostat is generally fitted with a small air vent. The jiggle valve releases the air while cooling water is being added, and closes when even the slightest water pressure is applied as the engine start running, thereby preventing the cooling water from flowing out. Inspection Item Thermostat Operating Temperature Required Tool: Thermometer, Agitating Rod Initial Opening Temperature: 82 ℃ Full Opening Temperature: 95 ℃ Valve Lift: 10mm
  • 40. 4JB1-TC Engine-39 COOLING FAN & FAN CLUTCH 1. Cooling Fan 2. Cooling Fan Clutch 3. Cooling Fan Pulley 4. Cooling Fan & Water Pump Drive Belt 5. Water Pump The cooling fan consists of seven plastic blades and is fitted with a fan clutch of the fluid coupling type filled with silicon oil. The engine cooling capacity is designed to prevent engine overheating even at a high ambient temperature. Thus, it is un-necessary for the fan to run fast when the engine is running fast at a low ambient temperature. High speed operation of the fan increases noise and causes a marked power loss. The fan clutch senses and drop in the ambient temperature and controls the fan speed.
  • 41. 4JB1-TC Engine-40 Inspection Item Thermostat Operating Temperature Required Tool: Thermistor, Heat Gun Warm up the bimetal up to 80 deg. C. If the fan clutch rotates more readily, silicone grease is leaking internally. Cooling Fan Drive Belt Deflection Required Tool: Ruler Apply a force of 98Nm (10kg) to the drive belt mid-portion. Service Standard: 8 - 12 mm
  • 42. 4JB1-TC Engine-41 RADIATOR & RADIATOR CAP 1. Radiator 2. Intercooler The radiator is a device for a large volume of water in close contact with a large volume of air so that heat will transfer from the water to the air. The radiator core is divided into two separate and intricate compartments; water passes through one, and air passes through the other. The radiator is a tube type with corrugated fins. The corrugated fin type also consists of a series of long tubes extending from the top to bottom of the radiator. While fins are placed between the tubes and have a corrugation shape. Radiation efficiency is great in sprite of the same volume of the radiator, because of the corrugated fin has a great radiation area. Furthermore the louver on the corrugated fin increases air speed and this makes for increased radiation efficiency. The radiator cap has a pressure valve, which is used to maintain the pressure in the radiator at required level, and thus increases the capacity and cooling efficiency of the water pump. There is also a vacuum valve to take fresh air from the out side if the radiator pressure is reduced when the engine cools off, thereby protecting the radiator from collapse. Inspection Item Radiator Pressure Proof Required Tool: Radiator Cap Tester Testing Pressure: 147KPa (1.5kg/cm2) Radiator Cap Pressure Proof Required Tool: Radiator Cap Tester Positive Pressure: 88.2 - 118KPa (0.9 - 1.2kg/cm2) Negative Pressure: 1.0 - 3.9KPa (0.01 - 0.04kg/cm2)
  • 43. 4JB1-TC Engine-42 RESERVE TANK The reserve tank is employed to prevent coolant loss, and to control the internal pressure of the radiator tank, namely to ensure cooling efficiency. Generally, the coolant volume expands by about 5% when the temperature exceeds 90℃, and expanded volume of coolant overflows from the radiator. Therefore, the radiator has a suitable sized upper tank which corresponds to the increase in the volume of coolant. This prevents coolant loss to a large degree. Vapor, on the other hand, is forced out of the radiator. When the coolant temperature in the radiator falls, for example when the engine is stopped, the internal pressure in the radiator becomes negative which causes the coolant to be drawn back into the radiator. Thus coolant loss is prevented, and the period between topping up the radiator is greatly increased.
  • 44. 4JB1-TC Engine-43 FUEL SYSTEM 1. Overflow Pipe 2. Injection Nozzle 3. Fuel-cut Solenoid 4. Fuel Tank 5. Water Separator 6. Fuel Filter The fuel system consists of the fuel tank, the water separator, the fuel filter, the injection pump, and the injection nozzle. The fuel in the fuel tank of a diesel engine is pumped up into a fuel filter by a feed pump, where water and dust are removed from the fuel before fed to the injection pump. The injection pump feeds the fuel at very high pressure through injection pipes, and injects it into the combustion chambers of the engine through injection nozzles. The feed pump increase the fuel feed rate in direct proportion to the engine speed, but the amount of fuel required to be injected into the cylinders varies with vehicle running conditions, and not in direct proportion to engine speed. Thus, there is always an excess of fuel from the feed pump. Therefore, the fuel return pipes run from the nozzles and injection pump to the fuel tank via fuel filter to return the excess fuel to the fuel tank.
  • 45. 4JB1-TC Engine-44 FUEL INJECTION PUMP FUEL DELIVERY The drive shaft rotated by the engine timing belt or gear, rotates the cam disk through a cross coupling. The cam disk’s press-fitted pin fits into a groove in the plunger to rotate the plunger. To reciprocate the plunger, the cam disk is also equipped with raised face cams, arranged uniformly around the circumference of the cam disk. The cam disk’s face cams are always in contact with the roller holder assembly’s rollers because the cam disk and the plunger are press against the roller holder assembly by the set force of the two plunger springs. Because of this plunger can follow cam disk movement. Therefore, as the cam disk is rotated on the roller holder assembly by the drive shaft, simultaneous plunger rotation and reciprocating movement is possible. The roller assembly construction is such that it can only rotate in a certain angle range in accordance with timer operation. Because the plunger rotates and reciprocates simultaneously, suction of the fuel into the pressure chamber, pressurization in the pressure chamber, delivery into the engine cylinder are possible.
  • 46. 4JB1-TC Engine-45 SPEED GOVERNOR The governor is located in the upper part of the injection pump chamber. Four flyweights and a governor sleeve are held in the flyweight holder, witch is mounted on the governor shaft. The flyweight holder is rotated and accelerated by the drive shaft gear, through rubber dampers. The governor lever assembly is supported by pivot bolts in the pump housing, and the ball joint at the bottom of the lever assembly is inserted into the control sleeve, which slides over the outside surface of the plunger. The top the lever assembly (the tension lever) is connected to the governor spring by a retaining pin, while the opposite end of the governor spring is connected to the control lever shaft. The control lever shaft is inserted into the governor cover and a control lever shaft. The accelerator pedal is connected directly to the control lever by a cable, and the governor spring set force changes in response to the control lever piston (i.e. accelerator pedal position). Injection quantity control is governed by the mutually opposing forces of the flyweight centrifugal force and the governor spring’s set force. The flyweight centrifugal force, which changes in response to engine speed, acts on the governor lever through the governor sleeve. The governor spring’s set force, which is dependant on control lever position, i.e. accelerator pedal position, acts on the governor lever through the retaining pin.
  • 47. 4JB1-TC Engine-46 INJECTION TIMING In the lower part of the injection pump is the timer, in the centre of which the timer piston is positioned. On the low pressure side of the timer piston is a timer spring with a predetermined set force; the pump chamber fuel pressure acts on the opposite side (high pressure side). The timer piston position changes in accordance with the balance of these two forces, to rotate the roller holder via the roller holder pin. When the timer piston compresses the timer spring, the injection timing is advanced (the roller holder rotates in the reverse rotation direction), and through timer piston movement in the opposite direction the injection timing is retarded. Injection timing is controlled by the above. FEED PUMP The feed pump comprise a rotor, blades and liner. Drive shaft rotation is transmitted through a key to the rotor to rotate the rotor. The inside circumference of the liner is eccentric to the center of rotor rotation. Four blades are installed in the rotor. Centrifugal force forces the blades outwards during rotation to contact the inside surface of the liner and form four fuel chambers. Therefore, the volume of these four chambers increases through rotor rotation to suck fuel from the fuel tank. Conversely, when the volume of these four chambers decreases fuel is pressurized.
  • 48. 4JB1-TC Engine-47 REGULATING VALVE Feed pump fuel delivery pressure increases proportionately with an increase in injection pump speed. However, the total fuel injection quantity necessary for the engine is considerably less than that delivered by the feed pump. Therefore, in order to prevent an excessive increase in the pump chamber pressure caused by the excess fuel, and to adjust the pump chamber pressure so that it is usually within the specified limit, a regulating valve is installed near the feed pump outlet. The timer performs timing control using the pump chamber pressure, which is regulated by the regulating valve.
  • 49. 4JB1-TC Engine-48 FUEL INJECTION NOZZLE The fuel is injected inside the combustion chamber by means of single stage injectors with five holes. These holes have a diameter of 0.2mm. -Desired Operating Pressure: 19.5 MPa (1st) / 26.5 MPa (2nd) -Adjusting Operating Pressure: 20.0 - 21.0 MPa (1st) / 27.5 - 28.5 MPa (2nd) This nozzle is following uniqe constructions. The position is of the first and second springs are reversed, with the first spring located at the top. The nozzle holder body is unified construction, decreasing the number of componenet parts. Pre-lift is provided between the lift piece and the spring seat. Pre-lift is adjusted at the factory. (Pre-lift is ensured through the assembly of the nozzle, spacer and lift piece. Full needle valve lift, second opening pressure and pre-lift can be measured simulanenously.
  • 50. 4JB1-TC Engine-49 1st Opening Pressure The force of the high pressure fuel delivered by the injection pump acts to push the needle valve up. When this force exceeds the set force of the first spring, the nozzle's needle valve pushes the first pushrod up and the valve opens. (First opening pressure is repreasented by point E in the bottom left hand picture, and point A in the bottom right picture.) 2nd Opening Pressure When the first pushrod has been lifted through the pre-lift, it coantacts the second pushrod. As the set force of the second spring is acting on the second pushrod, the combined forces of both the first spring and the secoond spring then act on the needle valve, which will not lift unless these forces are When the high pressure fuel (I.e. in-line pressure) overcomes the combined forces of the first and secon springs, the needle valve is again lifted and main injection can begin. (Second opening pressure is represented by point F in the bottom left picture and B - C in the bottom right picture.)
  • 51. 4JB1-TC Engine-50 INJECTION TIMING ADJUSTMENT Align The No. 1 Cylinder to TDC 1) Rotate the crankshaft and bring the piston in the No.1 cylinder to TDC ① on the compression stroke. Then, crankshaft pulley TDC line must be aligned with the timing mark ②. Install The Timing Gauge to The Distributor Head 2) Disconnect the injection pipe from the injection pump and remove a bolt from the distributor head. Insert a screw driver into a hole in the fast idle lever and turn the lever to canel the cold starting device function. 3) Install the static timing gauge ③ to the distributor head. Set The Timing Gauge to Zero 3) Rotate the crankshaft to bring the piston in the No.1 cylinder to a point 30 - 40°BTDC. And set the timing gauge needle to zero.
  • 52. 4JB1-TC Engine-51 Timing Gauge Reading at 0.5mm Plunger Lift Point 4) Rotate the crankshaft clockwise and read the crankshaft timing pulley timing mark when the timing gauge indicated 0.5mm lift point. -Standard: BTDC 4° Adjust Injection Timing to Standard 5) If the injection timing is out of standard, adjust the injection pump setting angle depending on indicated timing.
  • 53. 4JB1-TC Engine-52 ELECTRICAL PARTS STARTER MOTOR Starter Assembly Connecting Diagram The starting system employs a magnetic type reduction starter in which the motor shaft is also used as a pinion shaft. When the starter switch is turned on, the contacts of magnetic switch are closed, and the armature rotates. At the same time, the plunger is attracted, and the pinion is pushed forward by the shift lever to mesh with ring gear. Then, the ring gear runs to start the engine. On the 4JB1-TC engine has an output of 2.0 or 2.2 kW made by Hitach.
  • 54. 4JB1-TC Engine-53 1. Magnetic Switch Assembly 2. Magnetic Switch 3. Adjusting Shims 4. Plunger 5. Torsion Spring 6. Shift Lever 7. Gear Case 8. Dust Cover 9. Bolt 10. Pinion Assembly 11. Clutch 12. Pinion Shaft 13. Return Spring 14. Pinion Stopper 15. Pinion Stopper Clip 16. Bearing Retainer 17. Screw 18. Motor Assembly 19. Armature 20. Yoke 21. Brush Holder 22. Rear Cover 23. Screw 24. Through Bolt 25. Lead Wire
  • 55. 4JB1-TC Engine-54 Inspection Item Commutator Run-out Required Tool: Dial Indicator, V-Block Service Standard: 0.02mm Service Limit: 0.05mm Commutator Mica Segments Wear Required Tool: Vernier Caliper Service Standard: 0.7 - 0.9mm Service Limit: 0.2mm Commutator Outside Diameter Required Tool: Vernier Caliper Service Standard: 35mm Service Limit: 34mm Armature Grounding Test Required Tool: Circuit Tester Hold one probe of the circuit tester against the commutator segment. And, hold the other circuit tester probe against the armature core. If the circuit tester indicates continuity, the armature is grounded. Armature Continuity Test Required Tool: Circuit Tester 1 Hold the circuit tester probes against two armature core segments. 2 Repeat Step 1 at different segments of the armature core. There should be continuity between all segments of the armature core.
  • 56. 4JB1-TC Engine-55 Yoke Field Winding Ground Test Required Tool: Circuit Tester Hold one circuit tester probe against the field winding end or brush. Hold the other circuit tester probe against the bare surface of the yoke body. If there is continuity, the field coil is grounded. Yoke Field Winding Continuity Test Required Tool: Circuit Tester Hold one circuit tester probe against the “C” terminal lead wire. Hold the other circuit tester probe against the field winding brush. There should be continuity. Brush Length Required Tool: Vernier Caliper Service Standard: 16.0mm (2.0kw) or 14.5mm (2.2kw) Service Limit: 10.0mm Brush Holder Insulation Test Required Tool: Circuit Tester Touch one probe to the holder plate and the other probe to the positive brush holder. There should be no continuity. Overrunning Clutch Inspect the overrunning clutch gear teeth for excessive wear and damage. Rotate the pinion clockwise. It should turn smoothly. Try to rotate the pinion in the opposite direction. The pinion should lock.
  • 57. 4JB1-TC Engine-56 GENERATOR Generator Assembly Connecting Diagram The basic charging system is the IC integral regulator charging system. The internal components are connected electrically as shown in connecting diagram. The generator features a solid state regulator that is mounted inside the generator. All regulator components are enclosed into a solid mold, and this unit along with the brush holder assembly is attached to the slip ring end frame. On the 4JB1-TC engine, two type of outputs (50A or 60A) can be used depends on vehicle specification.
  • 58. 4JB1-TC Engine-57 1. Vacuum Pump 2. Cover 3. Brush 4. Through Bolt 5. Pulley Assembly 6. Pulley Nut 7. Pulley 8. Fan 9. Rotor Assembly 10. Speacer 11. Ball Bearing 12 Rotor 13. Front Cover Assembly 14. Front Cover 15. Ball Bearing 16. Bearing Retainer 17. Screw 18. Terminal Bolt & Nut 19. Condenser 20. Rear Cover 21. Stator 22. Diode 23. Holder Plate 24. Brush Holder 25. IC Regulator Assembly 26. Lead Wire 27. Mold Terminal 28. IC Regulator Inspection Item Rotor Slip Ring Wear Required Tool: Vernier Caliper Check the rotor slip ring surfaces for contamination and roughness. If rough, polish with #500-600 sandpaper. Service Standard: 34.6mm Service Limit: 33.6mm Rotor Slip Ring Continuity Test Required Tool: Circuit Tester Check for continuity between slip rings. There should be continuity.
  • 59. 4JB1-TC Engine-58 Rotor Slip Ring Insulation Test Required Tool: Circuit Tester Check for continuity between the slip rings and the rotor core or shaft. There should be no continuity. Stator Coil Continuity Test Required Tool: Circuit Tester Check for continuity across the stator coils. There should be continuity. Stator Coil Insulation Test Required Tool: Circuit Tester Check for continuity between each stator coils and the stator core. There should be no continuity. Brush Length Required Tool: Vernier Caliper Service Standard: 20mm Service Limit: 6mm Diode Insulation Test Required Tool: Circuit Tester Check for continuity between the battery and each of the three stator coil lead terminals. If there is continuity, the diode is normal. Reverse the polarity of the test probes. If there is no continuity, the diode is normal.
  • 60. 5-8840-0200-0 Oil Filter Wrench (89.0mm / 3.5 in) 9-8523-1423-0 Valve Spring Compressor 5-8840-2033-0 Oil Seal Installer 5-8840-9018-0 Piston Ring Compressor 9-8523-1212-0 Valve Guide Replacer 5-8840-2036-0 Front Oil Seal Installer 5-8840-2675-0 Compression Gauge 4JB1-TC Engine-59 SPECIAL TOOLS
  • 61. 5-8531-7001-0 Gauge Adapter 5-8840-0266-0 Angle Gauge 5-8840-2038-0 Camshaft Bering Replacer 5-8840-2360-0 Rear Oil Seal Remover 5-8840-2359-0 Rear Oil Seal Installer 5-8840-2040-0 Cylinder Liner Installer 5-8840-2039-0 Cylinder Liner Remover 4JB1-TC Engine-60
  • 62. 5-8840-2000-0 Pilot Bearing Remover 5-8840-0019-0 Sliding Hammer 5-8522-0024-0 Pilot Bearing Installer 4JB1-TC Engine-61