2 dental photography2.pptm
•Download as PPTX, PDF•
9 likes•1,735 views

This document discusses the importance of dental photography and provides guidance on techniques and equipment. It begins by explaining that dental photography is valuable for documentation, patient education, and self-education. It then covers key aspects of dental photography including camera settings like ISO, shutter speed, and aperture. Types of lenses, flashes, and backgrounds are also reviewed. Guidelines are provided for a standard set of photos for treatment planning. Methods for shade selection and analyzing color features are also outlined. The conclusion emphasizes that mastering these techniques allows for more advanced documentation and treatment planning.

Recommended
More Related Content
What's hot
What's hot (20)
Similar to 2 dental photography2.pptm
Similar to 2 dental photography2.pptm (20)
More from Lama K Banna
More from Lama K Banna (20)
Recently uploaded
Recently uploaded (20)
2 dental photography2.pptm
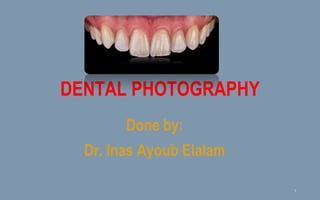
- 1. Done by: Dr. Inas Ayoub Elalam DENTAL PHOTOGRAPHY 1
- 2. INTRODUCTION Good photography lies at the heart of absolutely every area of esthetic dentistry. The correct use of the clinical camera is an invaluable way for the practitioner not only to document what is being done in terms of pre-treatment and post-treatment photographs of cases, thereby maintaining excellent clinical records, but also to improve patient education and enhance his or her self-education. 2
- 3. IMPORTANCE OF DENTAL PHOTOGRAPHY • Human memory is terribly short. So, patients easily forget what they looked like before they started treatment which sometimes puts the practitioner at substantial legal risk. • All practitioners learn by seeing clinical photographs in books and journals. Viewing their own patients in this same way frequently improves their dental abilities. • Increase the patient level of requested treatment & patient Communication. • It is an excellent supplement to traditional dental charting. • To be used in treatment planning. • Communication Dental technician. • Marketing 3
- 4. CAMERA DEVELOPMENT FROM HUMAN EYE PHYSIOLOGY 4
- 5. CORRELATION BETWEEN EYE AND CAMERA 5
- 6. UNDERSTANDING EXPOSURE TRIANGLE • Understanding the three main element of exposure & knowing how to adjust them will helps you to get the best out of your camera & to take great photographs. • They consist of: 1. ISO 2. Shutter Speed 3. Aperture 6
- 7. ISO • The level of sensitivity of your camera to available light. • It is typically measured in numbers, a lower number representing lower sensitivity to available light, while higher numbers mean more sensitivity. • More sensitivity comes at the cost though, as the ISO increases, so does the grain/noise in the images. • Examples of ISO: 100, 200, 400, 800, 1600. 7
- 9. SHUTTER SPEED • The length of time a camera shutter is open to expose light into the camera sensor. • Shutter speeds are typically measured in fractions of a second, when they are under a second. • Slow shutter speeds allow more light into the camera sensor and are used for low-light and night photography, while fast shutter speeds help to freeze motion. • Examples of shutter speeds: 1/15 (1/15th of a second), 1/30, 1/60, 1/125. 9
- 10. 10
- 11. But, lowering shutter speed will make a hazy photo if the object or camera are not fixed!!! 11
- 12. WHAT IS THE SOLUTION IN CASE OF THAT??? • Use a flash • Or increase iso sensitivity • Or fixe both camera by using tripod and the object • Or decrees focal ratio ( to be discussed) 12
- 13. 13
- 14. Aperture • A hole within a lens, through which light travels into the camera body. • The larger the hole, the more light passes to the camera sensor. • Aperture also controls the depth of field, which is the portion of a scene that appears to be sharp. • If the aperture is very small, the depth of field is large, while if the aperture is large, the depth of field is small. • In photography, aperture is typically expressed in “f” numbers (also known as “focal ratio”, since the f-number is the ratio of the diameter of the lens aperture to the length of the lens). • Examples of f-numbers are: f/1.4, f/2.0, f/2.8, f/4.0, f/5.6, f/8.0. 14
- 15. 15
- 16. UNDERSTANDING DIGITAL CAMERA MODES • Digital Camera Modes allow photographers to control the parameters of an exposure, specifically, Shutter Speed, Aperture and ISO. • While certain modes can fully automate the camera exposure, there are other modes that let the photographer manually control some or all parameters of the exposure. 16
- 17. • Here are the four main types of camera modes that can be found in most digital cameras today: 1. Program (P) 2. Shutter Priority (Tv) or (S) 3. Aperture Priority (Av) or (A) 4. Manual (M) 17
- 18. PROGRAM MODE • In “Program” mode, the camera automatically chooses the Aperture and the Shutter Speed for you, based on the amount of light that passes through the lens. • This is the mode you want to use for “point and shoot” moments, when you just need to quickly snap a picture. • The camera will try to balance between aperture and shutter speed, increasing and decreasing the two based on the intensity of light. 18
- 19. SHUTTER-PRIORITY MODE • In “Shutter Priority” mode, you manually set the camera’s shutter speed and the camera automatically picks the right aperture for you, based on the amount of light that passes through the lens. • This mode is intended to be used when motion needs to be frozen. • If there is too much light, the camera will increase the lens aperture to a higher number, which decreases the amount of light that passes through the lens. 19
- 20. APERTURE-PRIORITY MODE • In “Aperture Priority” mode, you manually set the lens aperture, while the camera automatically picks the right shutter speed to properly expose the image. • You have full control over subject isolation and you can play with the depth of field, because you can increase or decrease the lens aperture and let the camera do the math on measuring the right shutter speed. • If there is too much light, the camera will automatically increase the shutter speed, while if you are in a low-light environment, the camera will decrease the shutter speed. 20
- 21. MANUAL MODE • As the name suggests, “Manual” mode stands for a full manual control of ISO, Aperture and Shutter Speed. • In this mode, you can manually set both ISO, the aperture and the shutter speed to any value you want – the camera lets you fully take over the exposure controls. 21
- 22. CAMERA SENSOR SIZE • Sensor size is important in photography because it has an impact upon image quality. If you have two cameras with the same pixel count, but one has a physically larger sensor than the other, the one with the larger sensor will usually produce better quality images. 22
- 23. UNDERSTAND THE CONCEPT OF MAGNIFICATION • Magnification - or more precisely, the magnification ratio - is simply the relationship between of the size of the (in-focus) subject's projection on the imaging sensor and the subject's size in reality. • Suppose that we're photographing a small child, 1 meter in height. Imagine that the height of the child's projection onto the sensor is 1cm. The magnification ratio is 1cm/100cm, or 1/100. 23
- 24. FOCAL LENGTH • The focal length tells us the angle of view—how much of the scene will be captured—and the magnification—how large individual elements will be. • The longer the focal length, the narrower the angle of view and the higher the magnification. • The shorter the focal length, the wider the angle of view and the lower the magnification. 24
- 25. TYPE OF CAMERA FLASH • Built-in & Pop-up Camera Flash • Dedicated Camera Flash • Macro Or Ringlight Camera Flash • Twin Flash • Hammerhead Camera Flash 25
- 26. 26
- 27. This picture is taken with point flashes (lateral flashes or twin flashes) (A). This kind of flash and its orientation prevent extensive reflection on the tooth surface. This is an ideal technique for documentation and image color determination. 27
- 28. With a true ring flash (C) or a pseudo-ring flash (the point flashes as close as possible to the objective) (B), the light is directly reflected by teeth toward the lenses, flattening the image and making the reflecting surface greater. Therefore, it is ideal to highlight the surface and texture. 28
- 29. LENSES 29
- 30. TYPES OF LENSES • Kit Lenses • Telephoto Zoom Lenses • Macro Lenses • Wide Angle Lenses 30
- 31. KIT LENSES • These days the lens that is offered as a package with the DSLR is generally called the ‘kit lens’. It is generally an entry level quality zoom lens. • They are usually a fairly general purpose lens designed for everyday shooting. 31
- 32. TELEPHOTO ZOOM LENSES • Zoom lenses are the most popular DSLR lenses at present and come in a range of configurations and levels of quality. • Obviously the benefit of zooms are that you do not need to physically get closer to your subject to get a tighter framing of the image. 32
- 33. 33
- 34. MACRO LENSES • These lenses are specifically designed for shooting objects up close. Many lenses and cameras come with a ‘macro’ setting but true macro lenses will produce images that are life size and that enable you to get in incredibly close from the subject you’re shooting. 34
- 35. WIDE ANGLE LENSES • As their name suggests, these lenses enable their users to take shots with a very wide perspective. • They are useful for landscapes and for getting in nice and close to subjects still fitting a lot of them in. 35
- 36. CURRENT BEST APPROACH FOR DENTAL PHOTOGRAPHY • The best practice for most people begins with the purchase of the equivalent of a 35-mm–type digital SLR camera. • SLR body made by either Nikon or Canon provides very good results. • Macro lens, typically one with a focal length around 100 mm. • A ring flash, dual point flash or a twin light source • cheek retractors and mirrors • visual contrast and can use black-out sticks in close-up shots to eliminate the out-of-focus background of the mouth. 36
- 37. 37
- 38. A black background (1) is suitable for discrimination of dentin and enamel shades, analysis of shape, and study of white and opalescence features. The absence of light inside the oral cavity makes the mouth background black or similar to black. This is what we find most of the time. 38
- 39. A white background (2) allows differentiation between translucent masses and study of the amber, orange, and reddish properties of teeth. When maxillary incisors in occlusion cover the mandibular incisors, the background turns white; this is a common situation. 39
- 40. A neutral gray background ( 3) promotes discrimination of tonality (Hue). Other colors (4) generally are used for artistic and graphic purposes; they do not have a true utility in the study of color. The red background makes teeth appear bluer than they actually are. 40
- 41. PHOTOGRAPHY FOR TREATMENT PLANNING • American Academy of Cosmetic Dentistry (AACD) recommended a standard set of 12 pictures for its accreditation examination. • The first picture should be a full-face picture, taken with the patient looking straight into the camera, with the interpupillary line parallel to the lower border of the frame, and the facial midline parallel to the vertical border of the fame. Framing should include from just below the chin to just above the hairline. 41
- 42. • All the other photographs are taken at a fixed magnification ratio of the equivalent of a 1 : 2 on 35-mm film and full-frame digital SLR cameras with aperture of f/22 or higher to provide acceptable depth of field. • The next pictures are a series of three pictures of the patient smiling. The frontal view has the central incisors in the middle of the picture parallel to the lower border of the frame and the facial midline parallel to the vertical border. • right and then left lateral smile views are taken, with the upper lateral incisor just above the middle of the picture and the occlusal view parallel to the lower border. 42
- 44. CLOSE-UP IMAGES • To see the detail in individual teeth, a close-up image should be taken at 1:1 magnification. The image is taken at f/22 in AP mode with the dual flashes. • To view translucency, a useful tool is “the Dental Contraster”. This tool allows either the maxillary anterior or mandibular anterior teeth to be easily isolated. 44
- 48. SET OF DENTAL PHOTOGRAPHS 48
- 49. 49
- 50. SET OF DENTAL PHOTOGRAPHS 50
- 51. How to do a dental photography ? 51
- 52. 52
- 53. 53
- 54. 54
- 55. 55
- 56. 56
- 57. 57
- 58. 58
- 59. SHADE SELECTION FOR COMPOSITE RESTORATION 59
- 60. Once the color picture is transferred to the computer (F), several programs are able to transform these images to gray scale mode to create a black and white picture. This sort of image gives useful information for analysis of enamel opacity and the overall Value; color pictures distract us from this purpose. 60
- 61. An underexposed photograph is considered especially useful for revealing the internal color features of teeth. Before the picture is taken, the exposure is reduced to approximately -0.7 /-1.3 exposure value (EV) to create an underexposed image. Optionally, but not ideally, this can be done on the computer, by decreasing the image brightness by approximately 15% to 20%. 61
- 62. This image has been digitally modified to increase the contrast (60%) and decrease the brightness ( 40% to 60%). Color features appear immediately in a very noticeable way. Color becomes so strong that soft tissues look swollen. This is one of the most important images that we should know how to obtain, to enable precise appreciation of color characteristics. 62
- 63. SHADE SELECTION FOR COMPOSITE RESTORATION 63
- 64. HALO • The appearance of a slightly opacified border at the incisal edge of the tooth, framing the translucency, is attributable to near total light reflection. • The light entering the incisal edge is reflected toward the inside of the tooth. Little or no light is transmitted through in this case, because of the angle of the lingual surface at the incisal edge 64
- 65. HALO • The yellow-orange color often apparent in this halo is due to light reflecting from the dentin, off the lingual surface of the incisal edge, and through the labial incisal edge. • The width of the halo varies with the angle of the incisal edge. The halo creates contrast between the shadowed (dark) oral cavity and the bluish translucency in the incisal edge. Without it, the incisal edge has less definition and blends more easily into the background. 65
- 66. 66
- 67. 67
- 68. 68
- 69. CONCLUSION • With an understanding of the techniques and armamentarium for photography, today’s practicing dentist can document and treatment plan cases in more technologically advanced ways than ever before. • Understanding these tools and techniques will also prove to be invaluable for communications between the dentist and the laboratory, other specialists, and the patient. 69
- 70. THANK YOU 70